This resource provides technical knowledge, recommendations, and examples to jumpstart your resin printing journey.
While creating our own resin room, we answer the big questions of:
- Where should I put my resin printer?
- When would I need an enclosure or heater?
- What ventilation or filtration should be used?
- What cleaning equipment do I need to get started?
To answer these questions, let us go on a journey of transforming a room for resin printing.
Visit our Ultimate Resin Printing Guide if you are looking for resin printers, CAD, slicers, resin, PPE, supplies, and more.
Table of Contents
Resin Room Planning and Preparation
A garage or workshop is the ideal location for a resin printer for most people - in this article we use a detached room
The house used in this article is located in Texas, uses well water, has a septic system, averages about 5°C (41°F) in winter, averages 33°C (91°F) in summer, and has plenty of critters around.
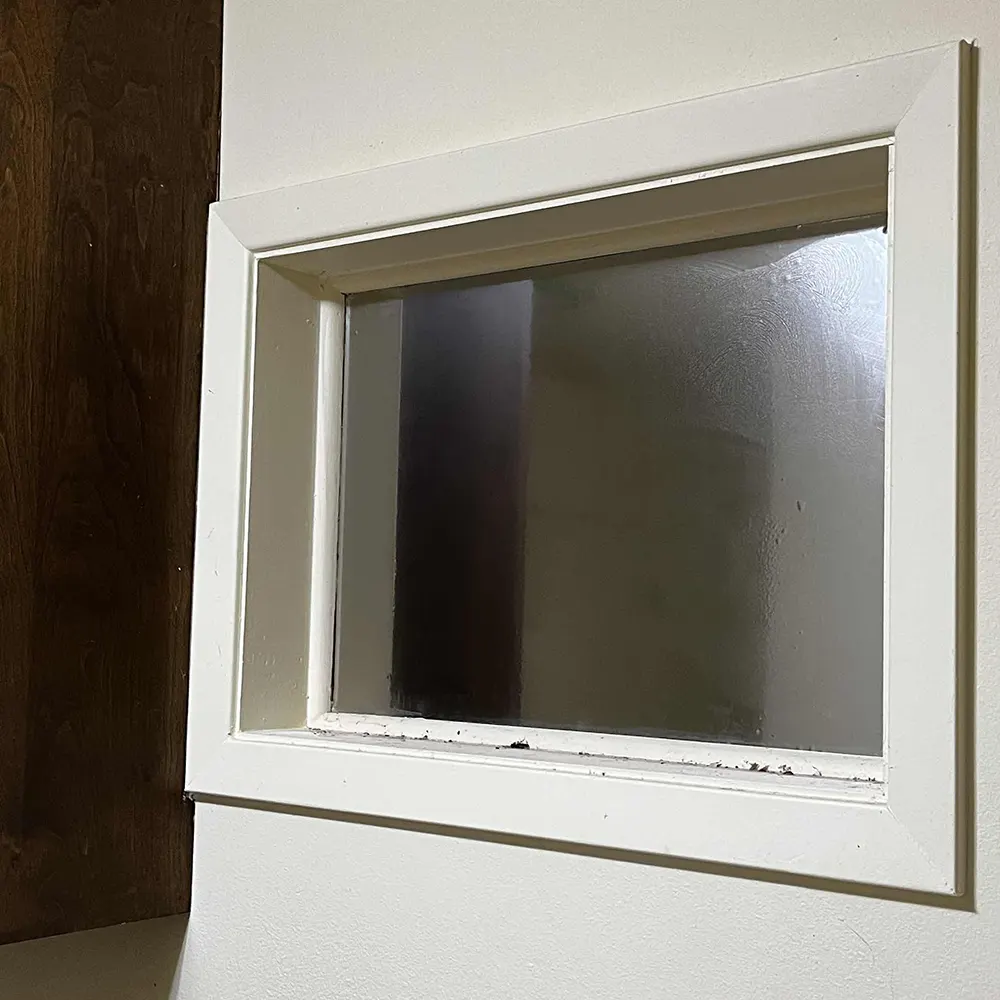
The ideal room in this house is detached from the primary residence, adjacent to the garage, and already has running water. As a bonus, the room has a small half-bath, two doors, one fixed window, and one vertical sliding window.
While the garage is also an ideal area to place resin printers, we are opting for transforming the detached room since it already has tables, running water, and will be easier to control the ventilation (in this situation).
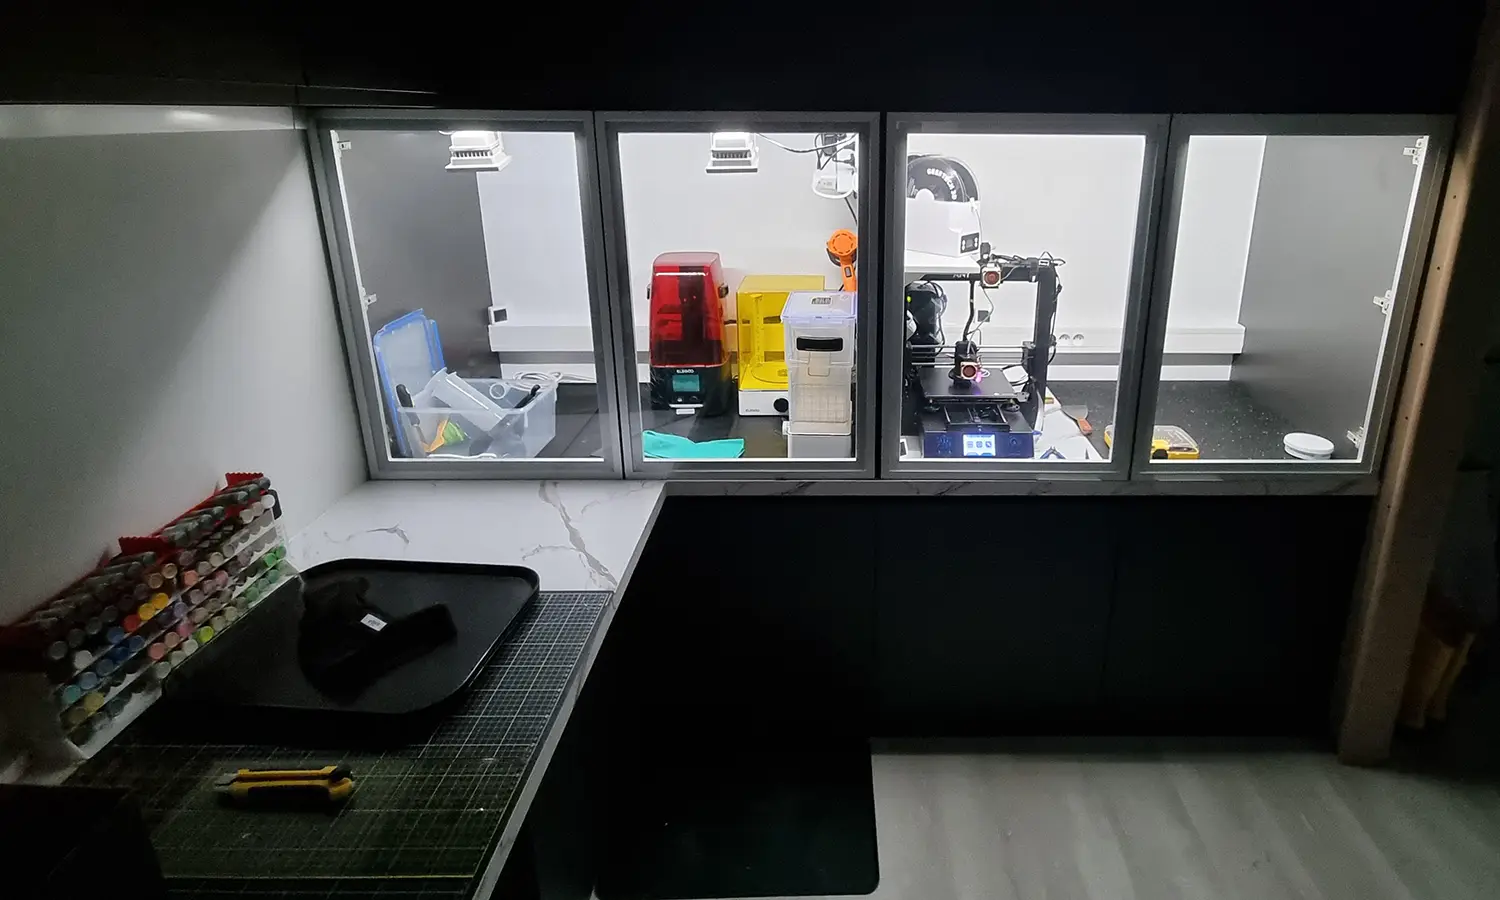
Planning the Layout of Equipment
To get our creative juices, a top-down overview is a good place to start. This particular room is detached from the household so it is an ideal place to put resin printers.
Essentials for our resin room:
- Protected table and rubber mat to set the resin printers on
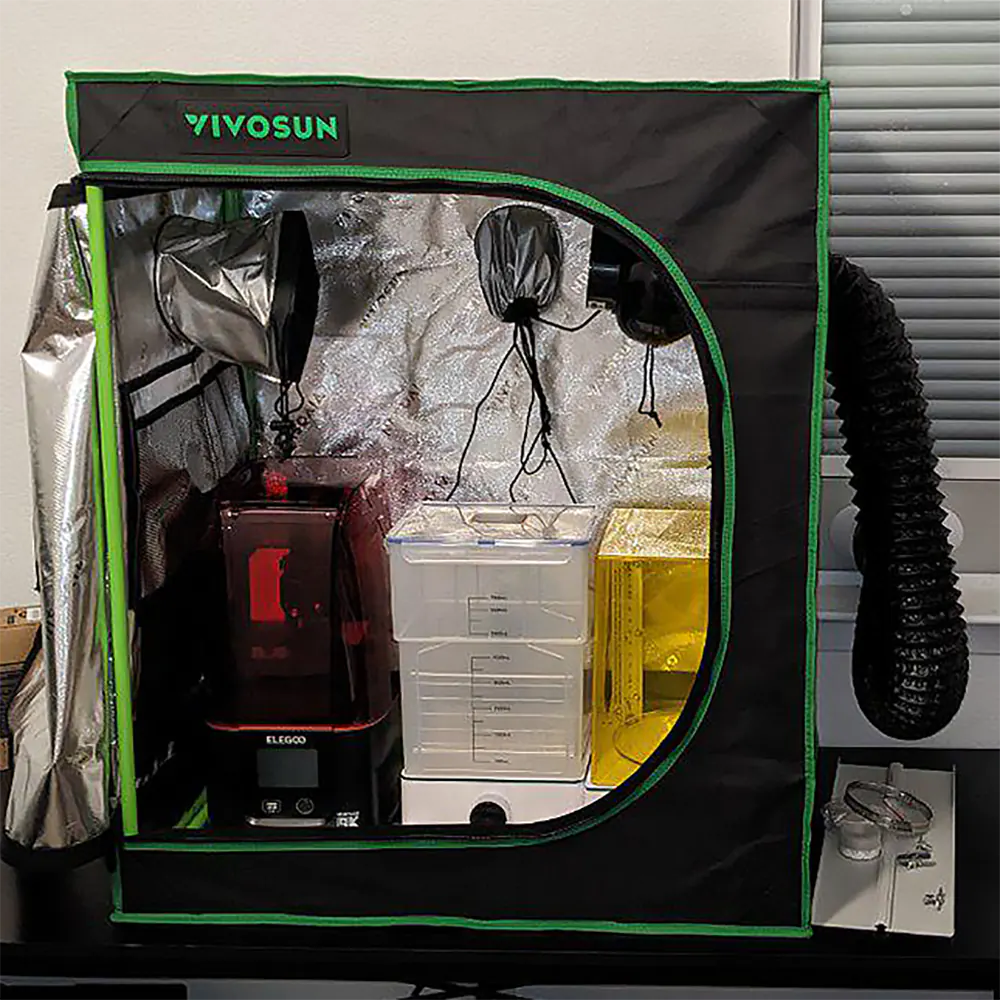
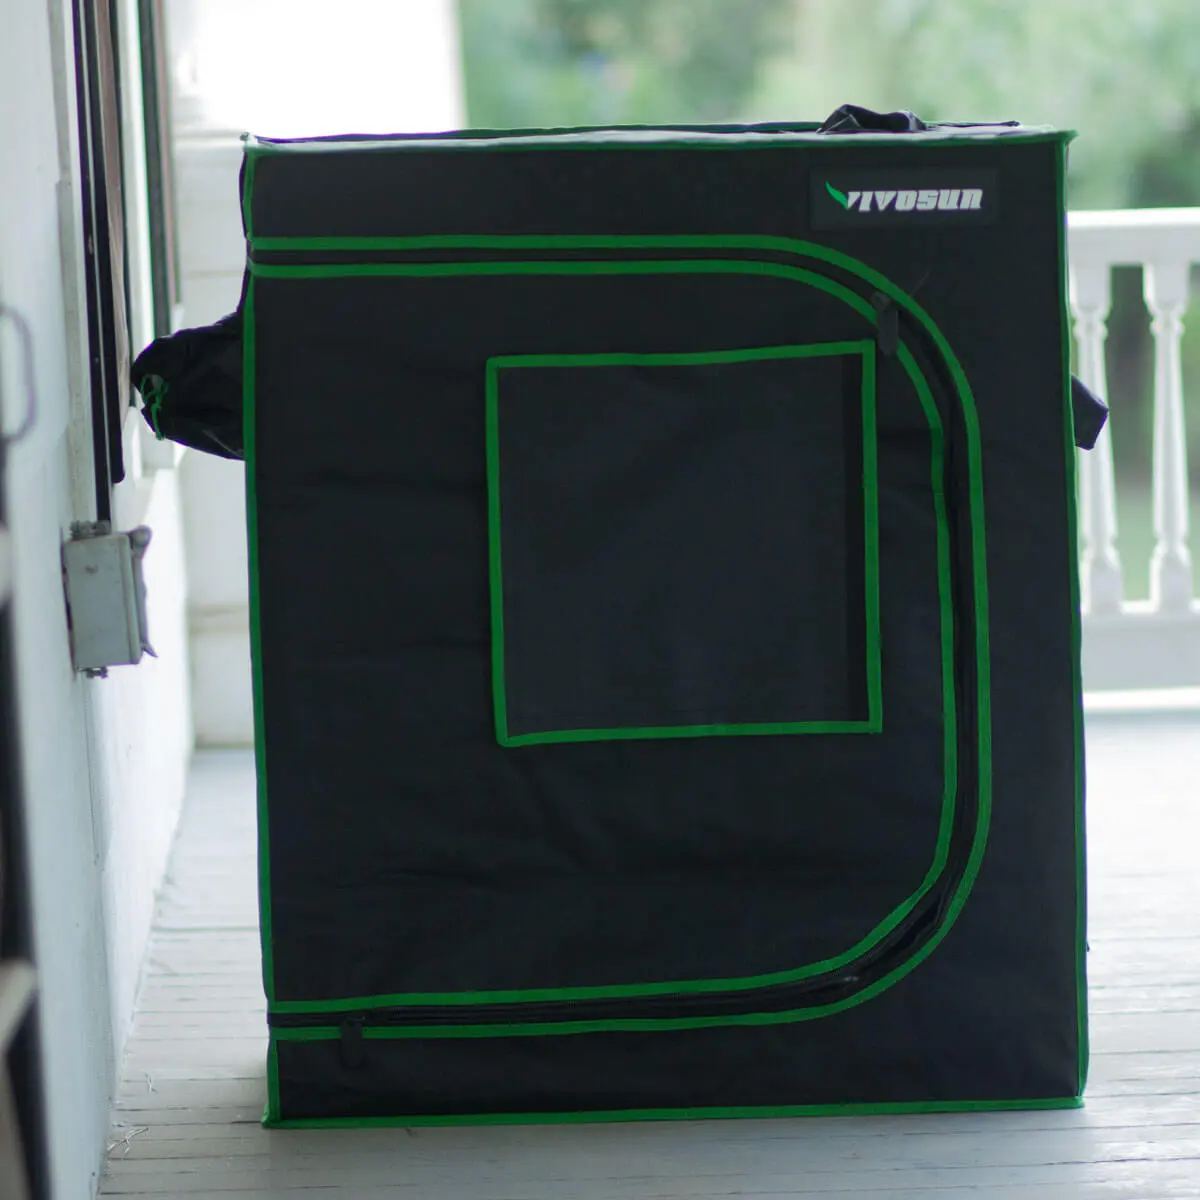
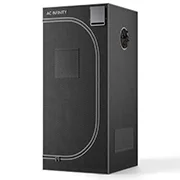
- Grow tent to insulate the printers during winter
- Small heater for the grow tent
- Ventilation via duct, either hooked up to the grow tent or open-air
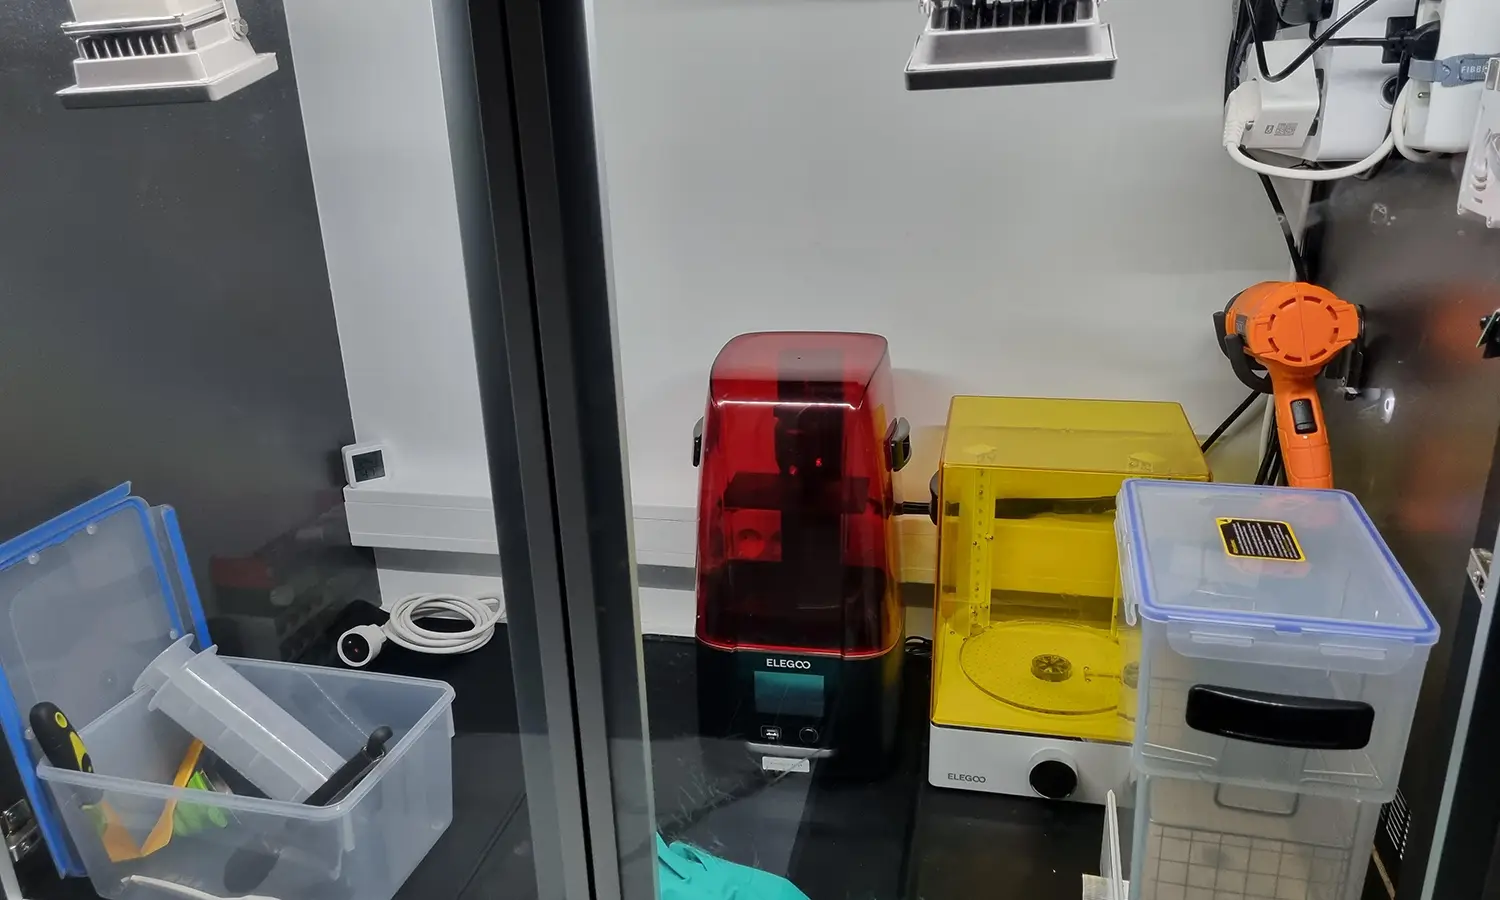
Resin equipment for streamlining:
- Resin sink, wash & cure machine, and ultrasonic cleaner
- Hands-free equipment: sink pedal, soap dispenser, and towel dispenser
- Dedicated or outdoor shower to quickly wash off resin and prevent contamination in your home
- Fume extractor capturing fumes from the grow tent before entering the room
- Overhead or portable UV light to cure accidental spills and contamination
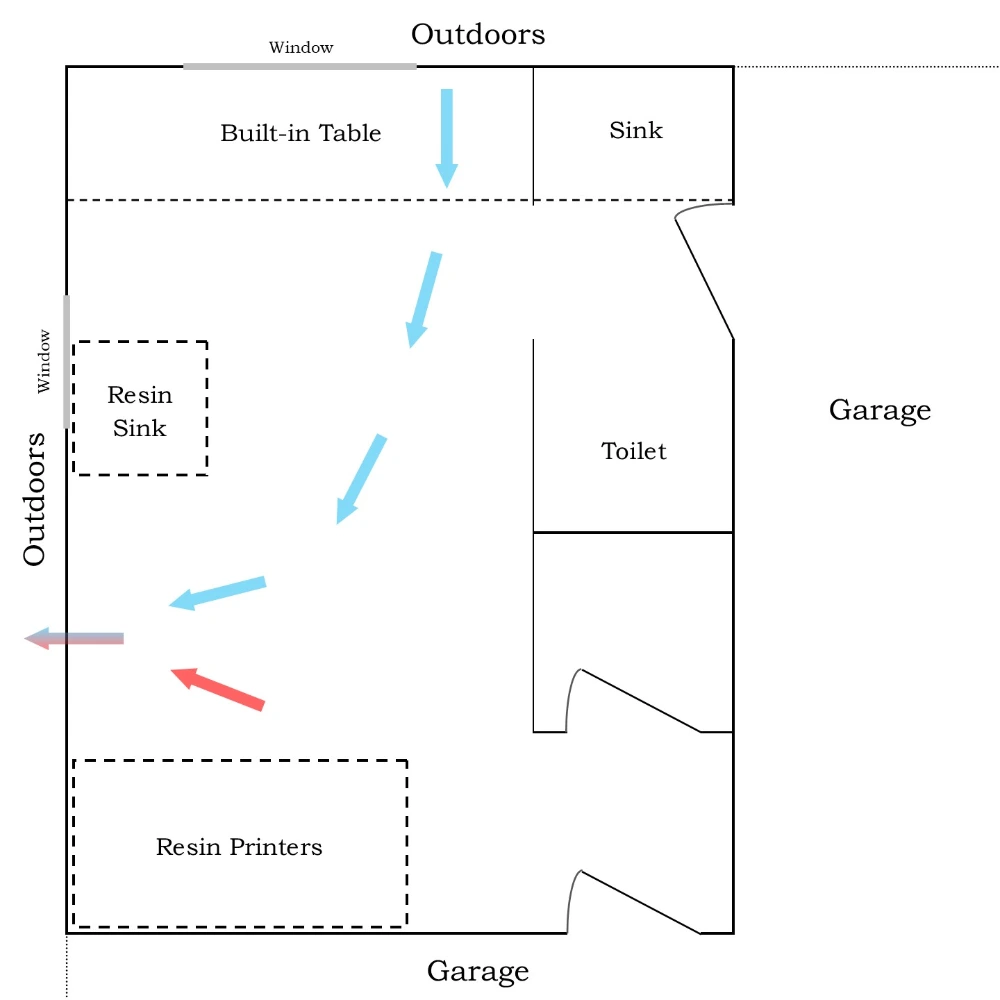
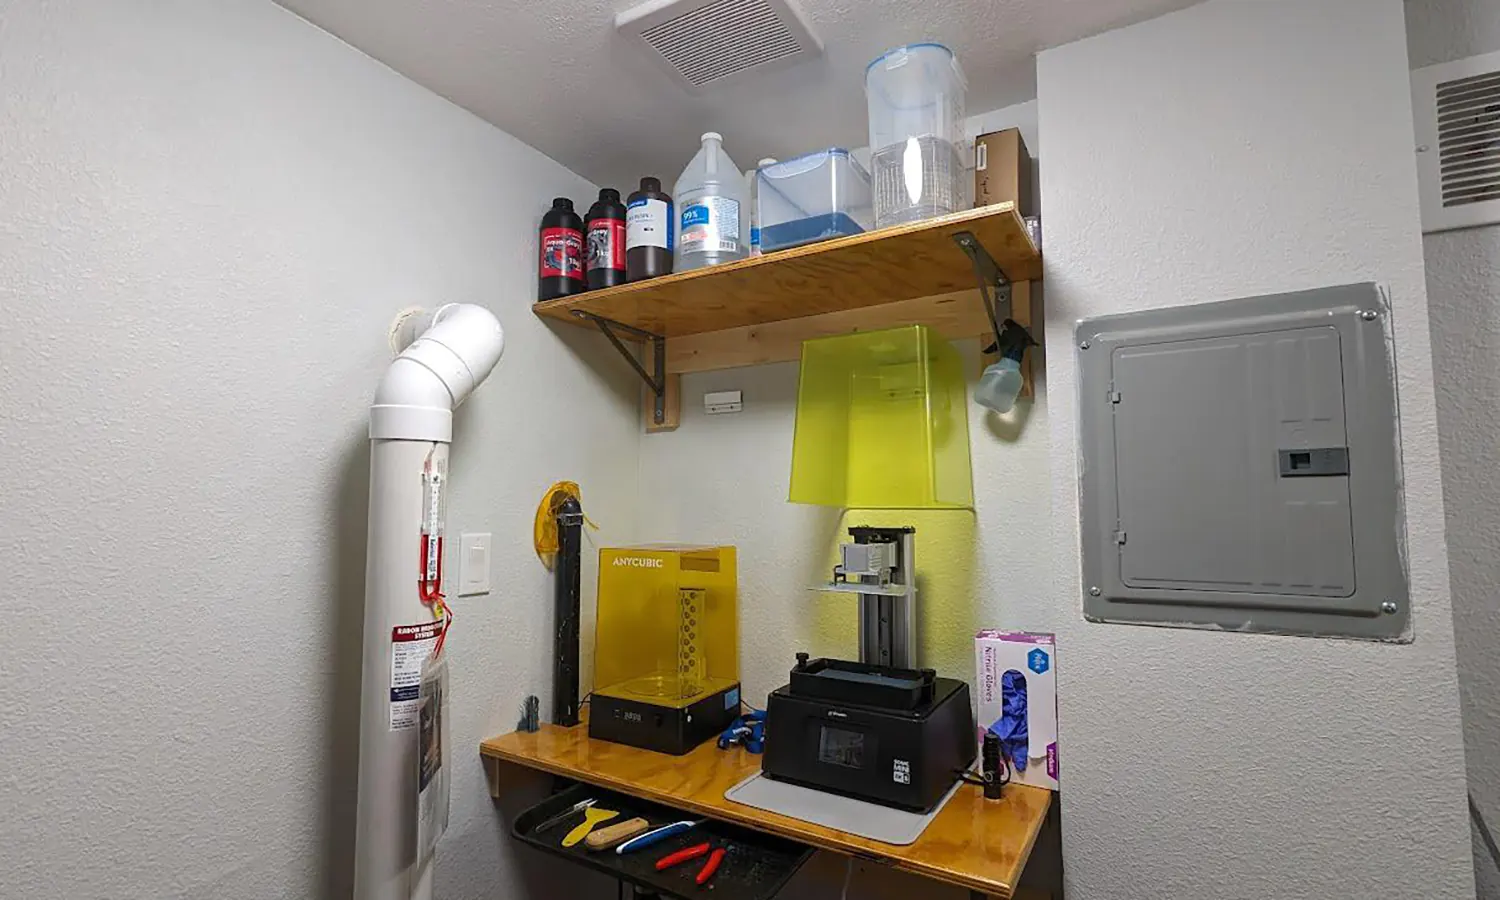
The sliding window, half-bath sink, the built-in table, and pre-existing duct hole are bonuses with this particular room. The sliding window can be used to fit an air conditioning unit or let air into the room. The half-bath sink cannot be used directly for resin, but we can wash our hands with it.
The built-in table is nice for storage. We opt out of placing the resin printers here since cold air coming in can chill the printers, and the contaminated air will pass locations we want to commonly stand in the room (e.g. the resin cleaning sink).
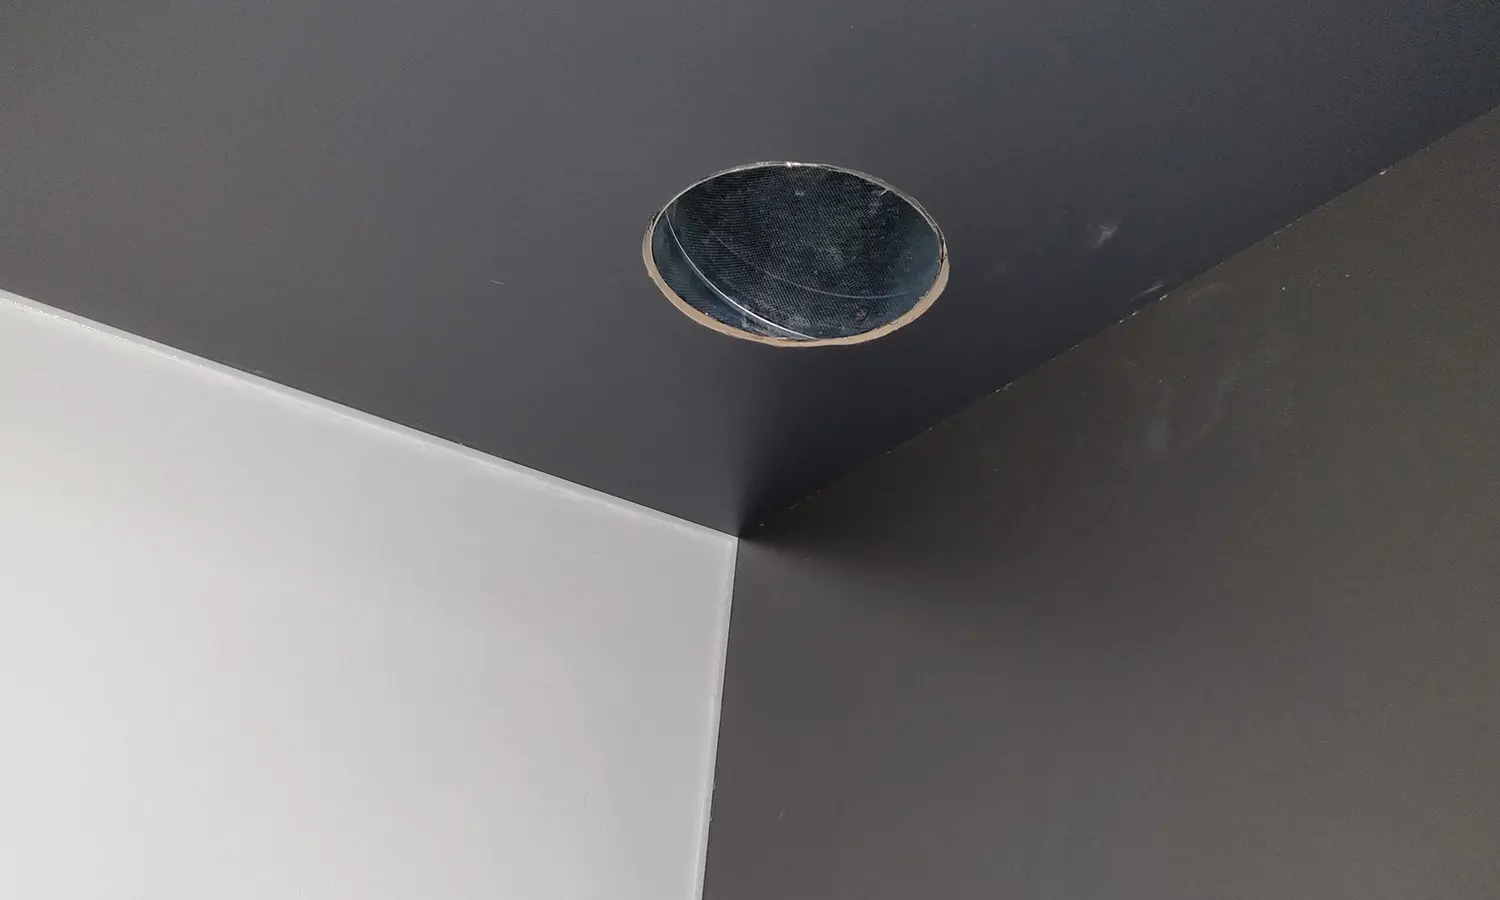
The pre-existing duct hole (that was used for a dryer at one point) will be used to evacuate the air from the entire room. This is located adjacent to the resin printers.
The fixed window and toilet have no major impact for our setup but are still features. You may be wondering what the resin sink is - we expand on this in the cleaning equipment section.
Room Preparation
Take the time to clean and prepare the area where you plan to put your resin printers.
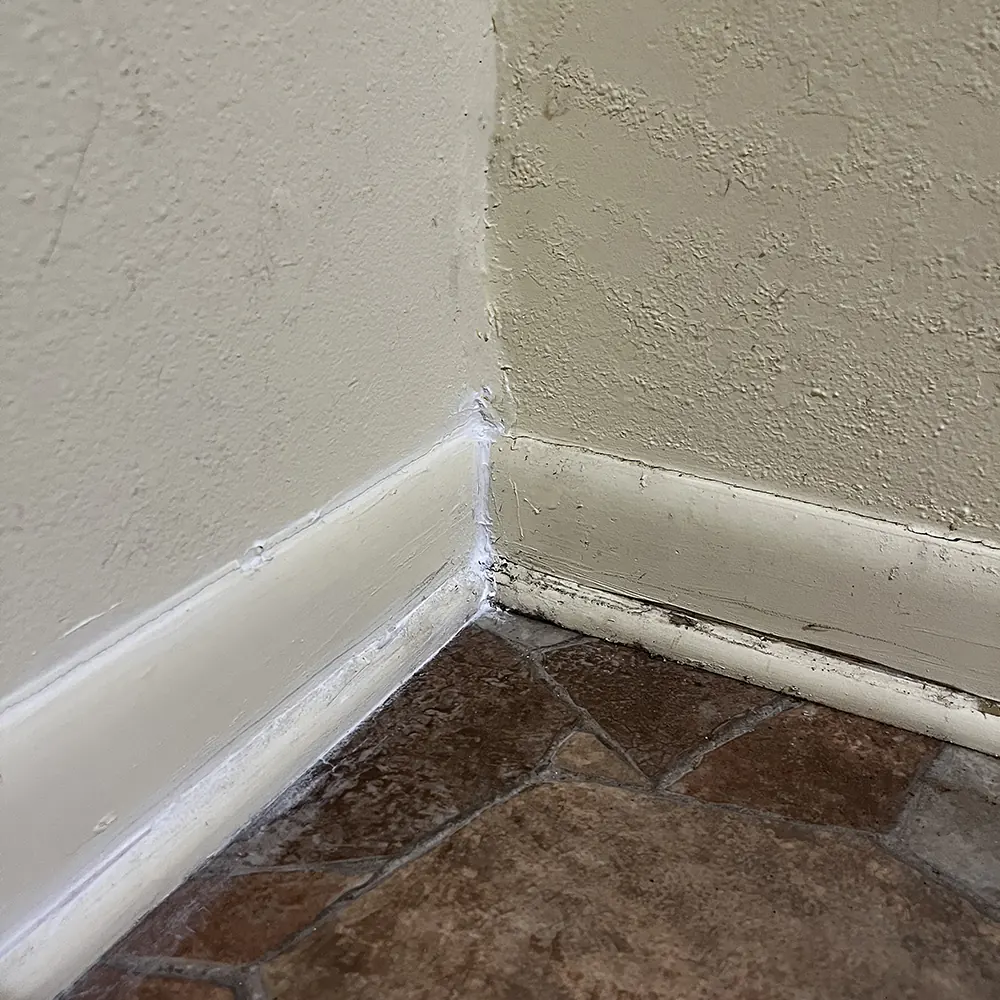
This room definitely needed some cleaning. There were plenty of dead bugs, spider webs, and dust on the countertops. We also made sure to clean the windows, trim, and the floor. Cleaners like Mean Green work fantastic for tasks like this and can clean resin parts.
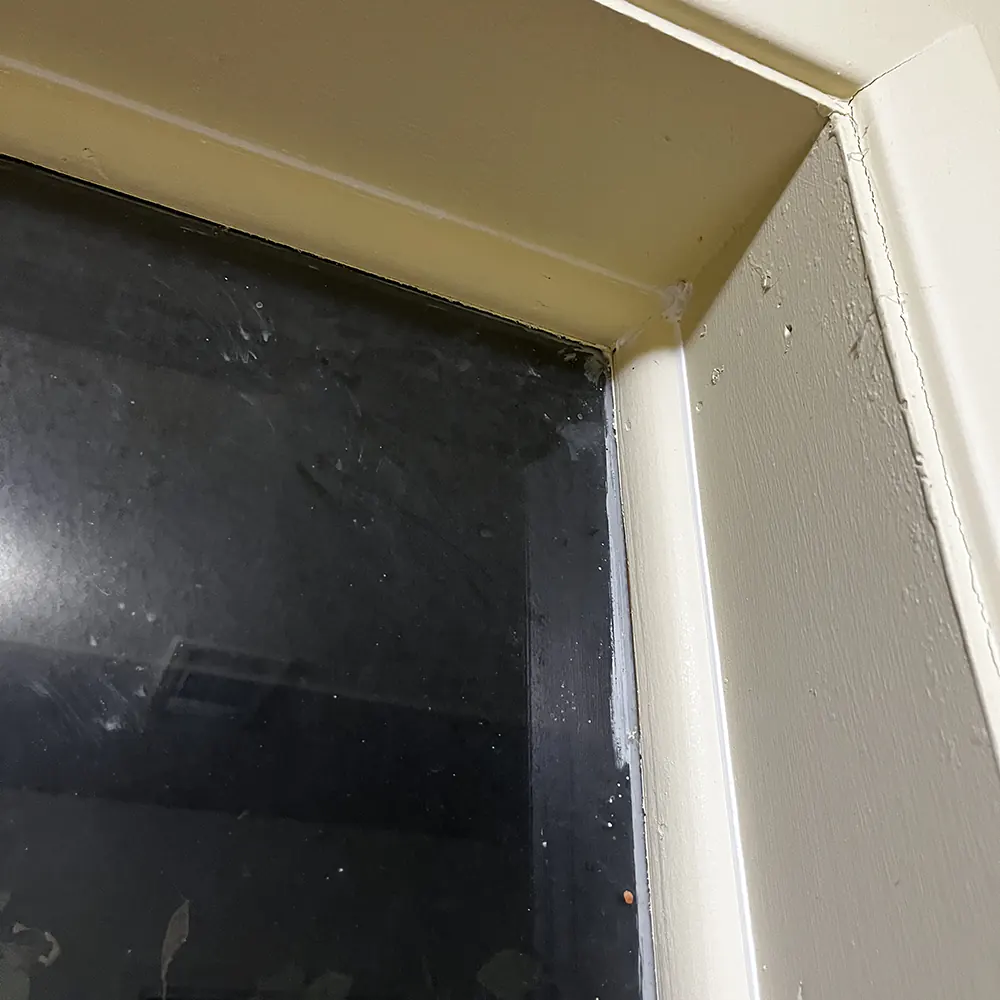
After letting the trim dry, we caulked the entirety of the room to mitigate any creepy crawlies from getting in, specifically scorpions. The windows needed a good caulking too.
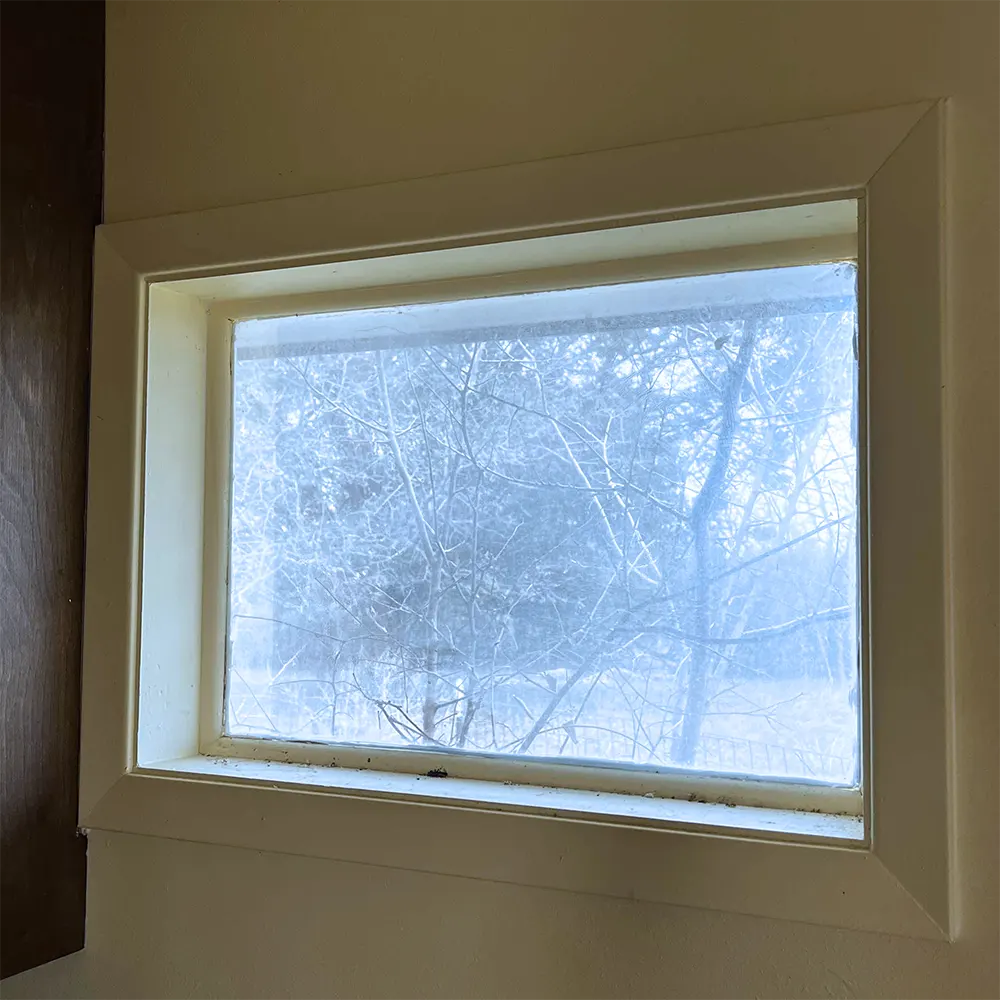
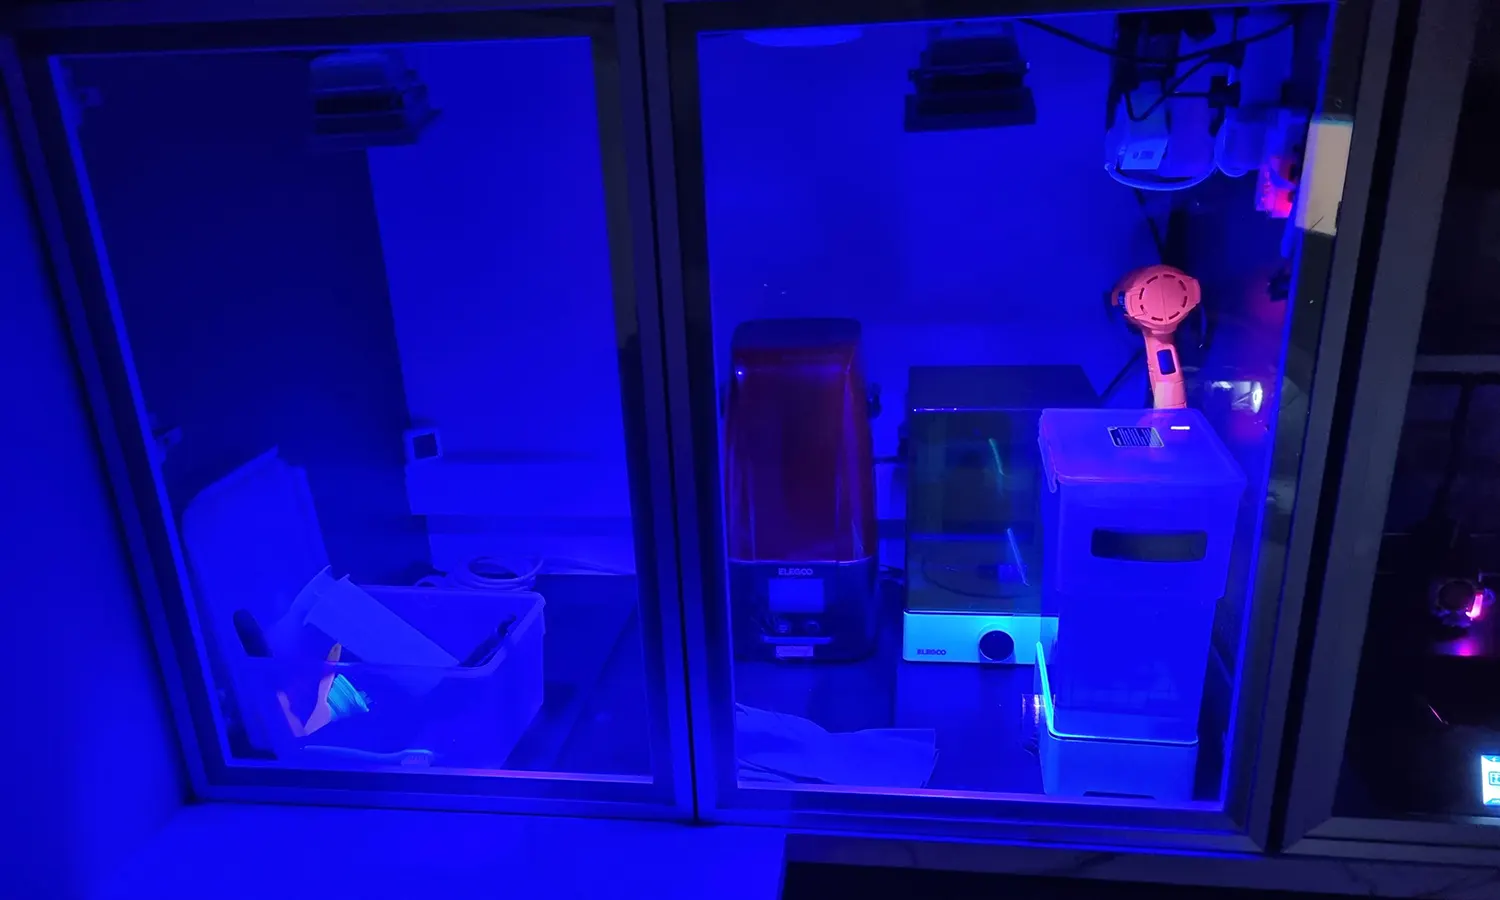
Tinting the windows near your resin printers will reduce incoming UV light by ~90%.
This is a decision you will have to make when setting up your resin workspace.
The advantage to this is that any resin in mixing cups will not rapidly cure and untreated prints would be protected.
The disadvantage is that the level of UV remaining will not be able to rapidly cure any resin contamination throughout the room.
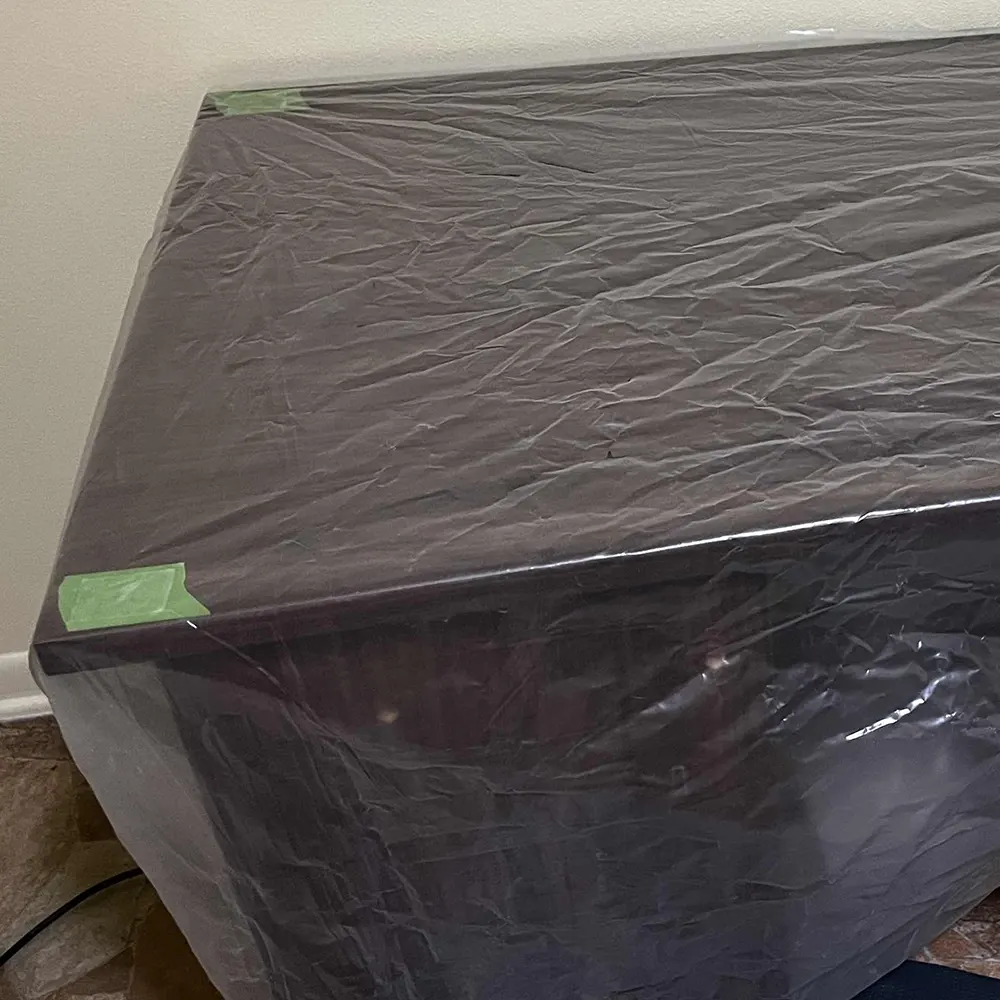
The table you set your resin printer on should be non-porous or protected with plastic sheeting.
The ideal table material for resin printing is non-porous, such as glass or metal. Porous tables, such as wood, can be used but they will need protection.
Tables should be covered with plastic sheeting that is at least 3 mils thick.
Silicone mats or any disposable roll-out mat can be used to set resin prints or equipment on. The messiest part of the entire cleaning process is often removing the print from the build plate. This can be done on the mats, but we prefer to use our resin sink.
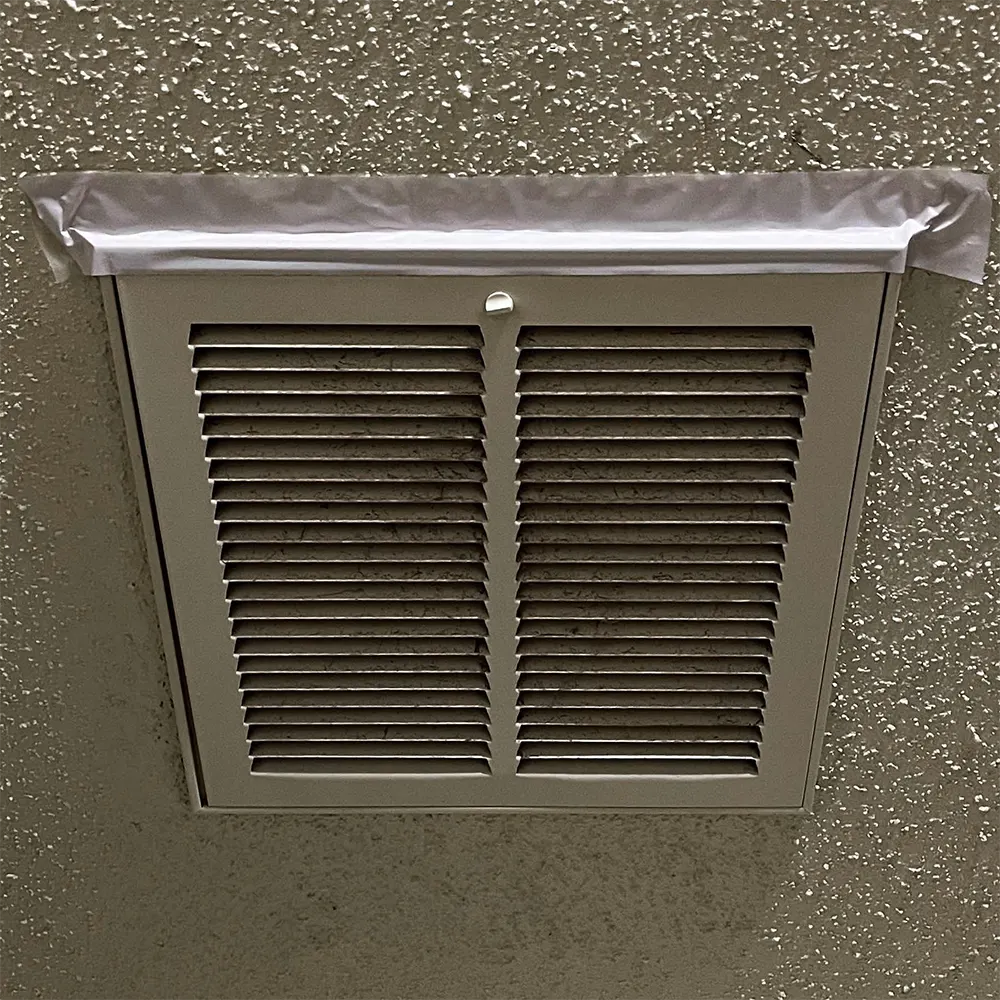
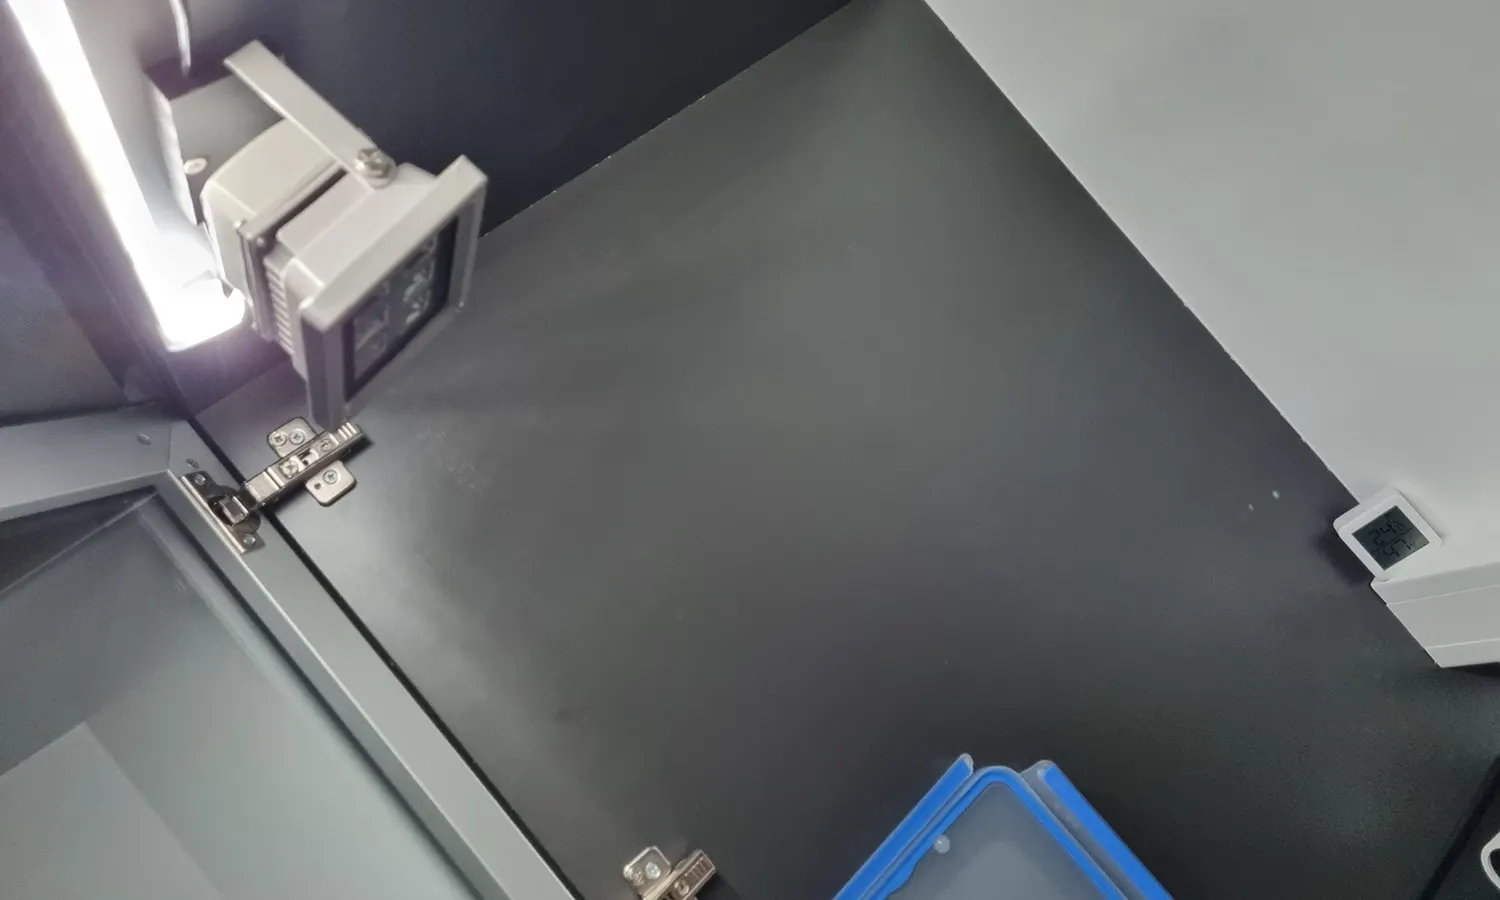
Household HVAC duct should be closed off to prevent resin fumes from entering your home.
These grilles allow cold and warm air to be brought into the room from the household HVAC system, which disrupts the environment you are creating and will waste energy. When the system is off, fumes from the resin room could leak back into the house.
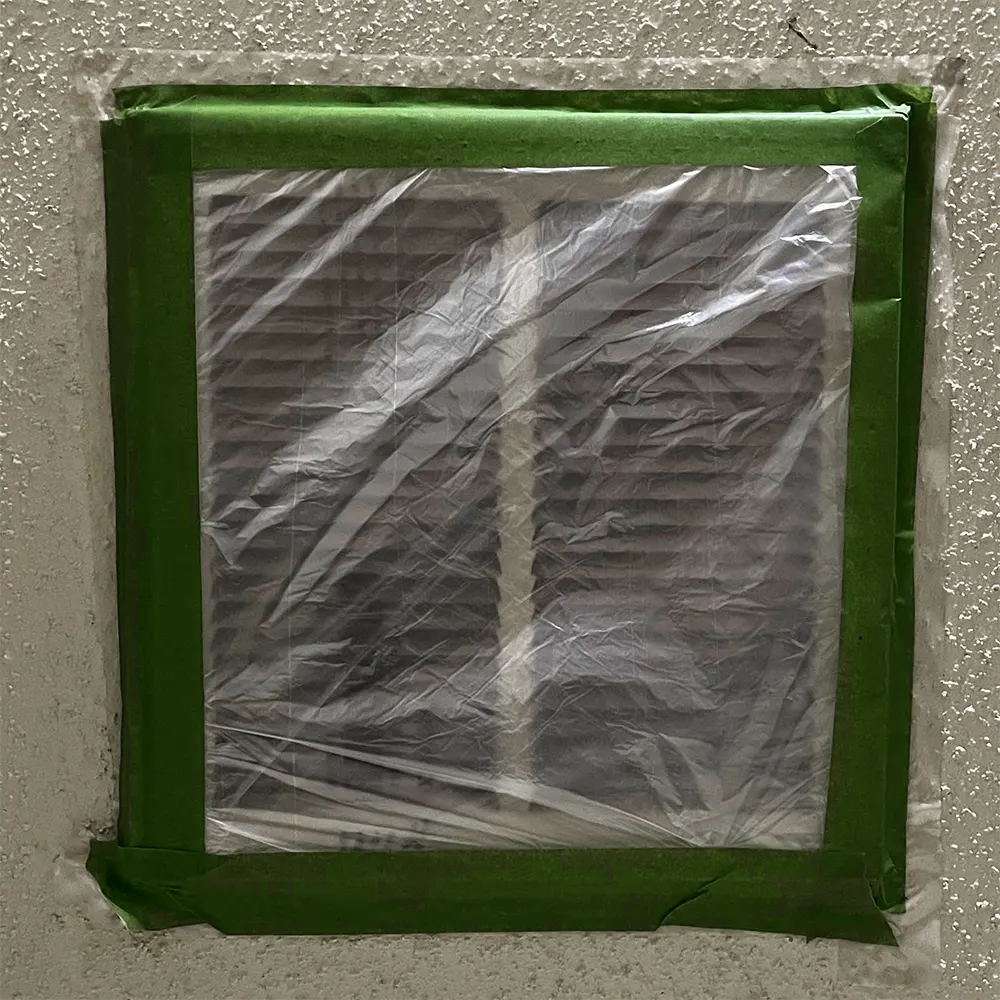
Now that our room is mostly airtight, we need to create an entrance for clean outside air and an exit for contaminated air.
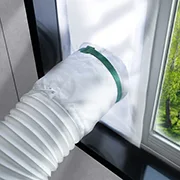
For the inlet, we cut and caulked a hole into a piece of Styrofoam insulation fashioned into the sliding window.
To force air into the room, we will put an adapter on the insulation and run duct to our Promethean air cleaner. We only have a MERV 13 filter on this air cleaner since preventing dust from entering the room is our main concern.
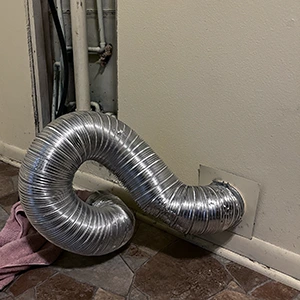
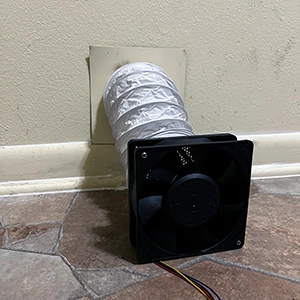
For the outlet, there is already a duct hole installed onto the wall for a dryer. The preexisting hole is perfect to start off with, but the aluminum duct is a bit damaged, so we will replace it with new vinyl duct.
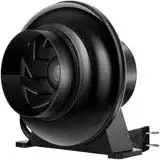
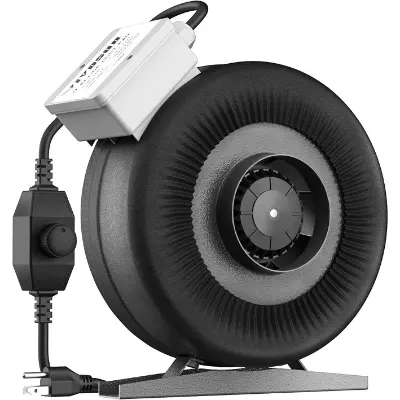
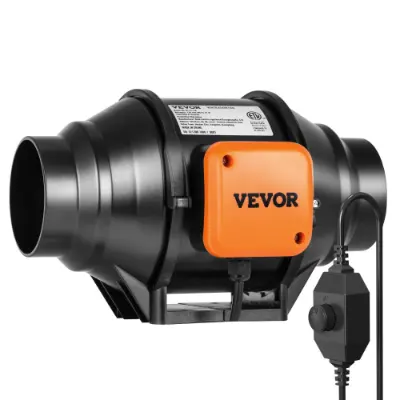
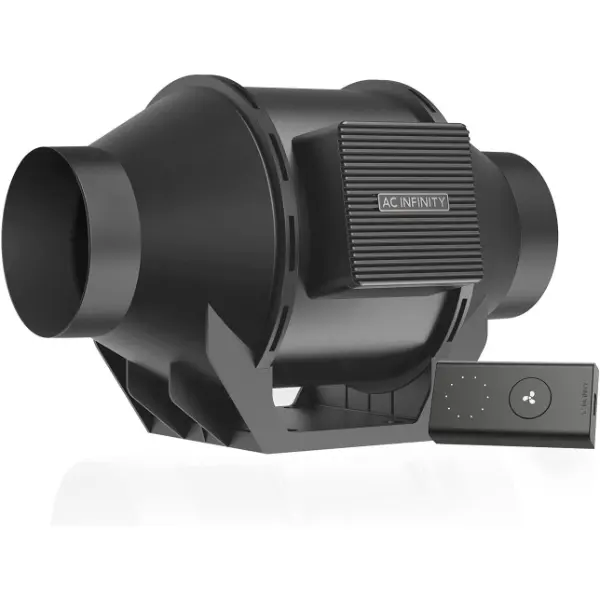
We will attach the duct to an inline duct fan or to an adapter that mounts on a 120 mm fan. Inline duct fans are mixed-flow fans that generate a high static pressure and flow rate, which will evacuate contaminated air quickly. Until we permanently mount our 120 mm fan, we used a piece of double-sided flooring tape.
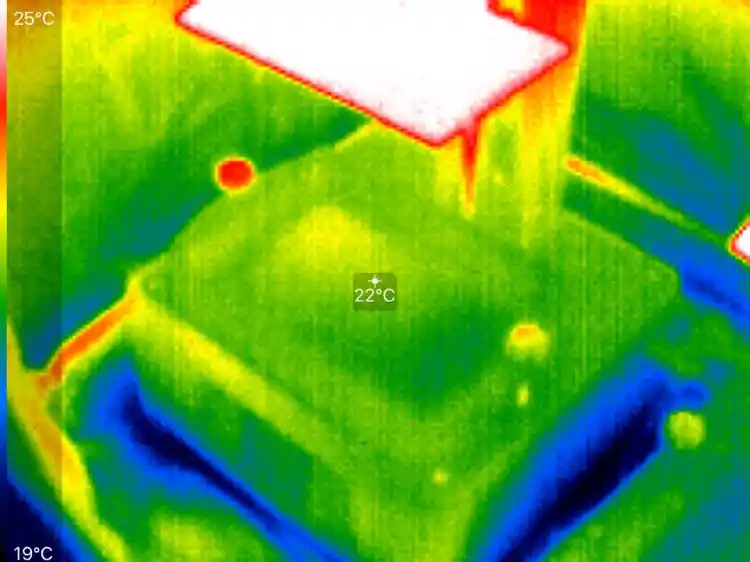
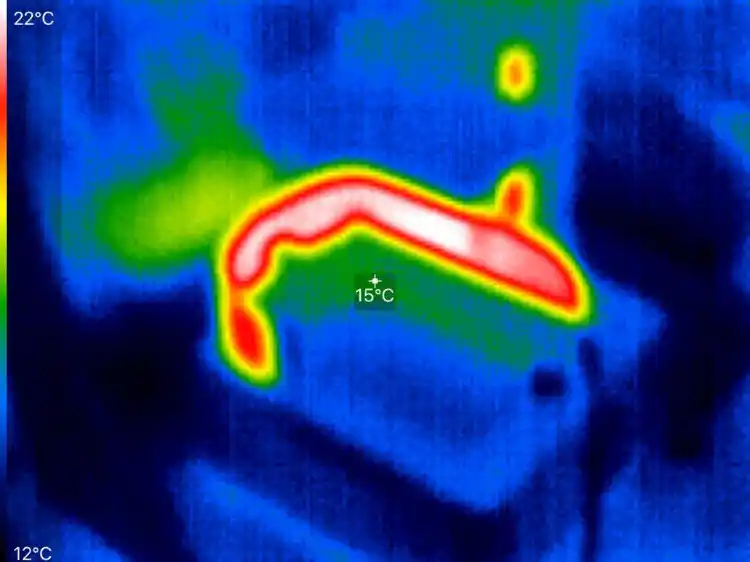
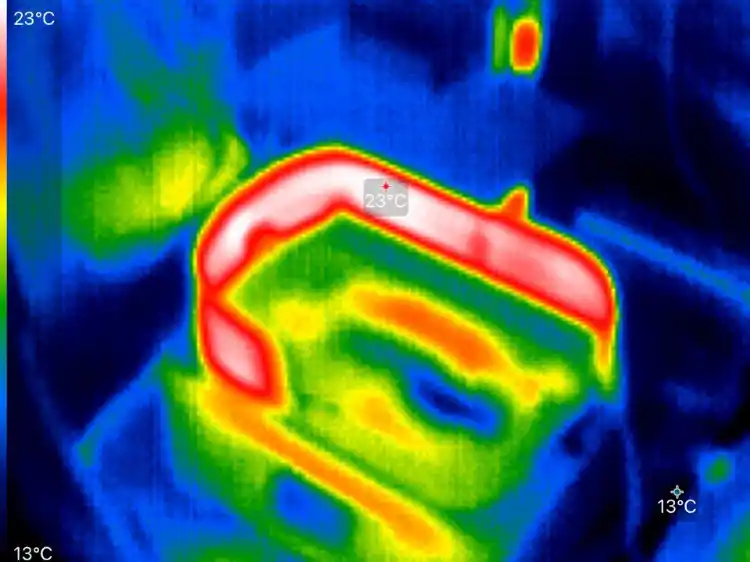
The thermal image below showcases the external wall of the detached room that is warmer than the environmental temperature. When you stick a resin printer in a garage or detached room, your printer/enclosure temperature will be aided by heat leaking from the home.
This is an excellent visual example as to why your ventilation should not be turned on max speed while printing during the winter. Your garage or room is indirectly heated, and max ventilation would rapidly chill the workspace. Once printing concludes the room can be vented.
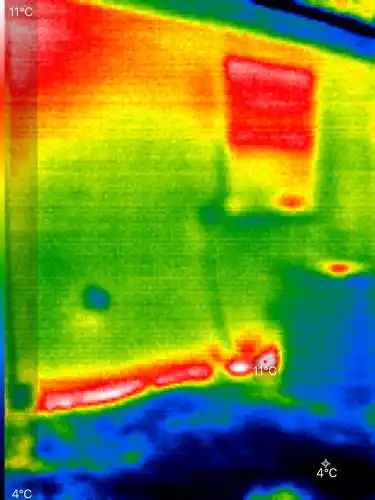
The temperature gradient of our detached resin room from outside.
Choosing an Enclosure for a Resin Printer
An enclosure contains heat, controls ventilation, allows for printing without the cover, and contains any spills that may occur during printing
Advantages of an enclosure:
- Increases control over ventilation and filtration
- Keeps the heat in during winter
- Provides energy savings, versus heating the entire room
- Blocks external UV light and allows for printing without the acrylic cover
- Helps keep dust away from the printer
- Contains any resin spills during printing
Disadvantages of an enclosure:
- More cost to the total budget
- Takes up a bit more space than the printers themselves
- People may give you funny looks
During winter, in many parts of the world, the temperature drops below the recommended level for resin printing, usually about 20°C (68°F). When this happens, an external heat source will need to be added.
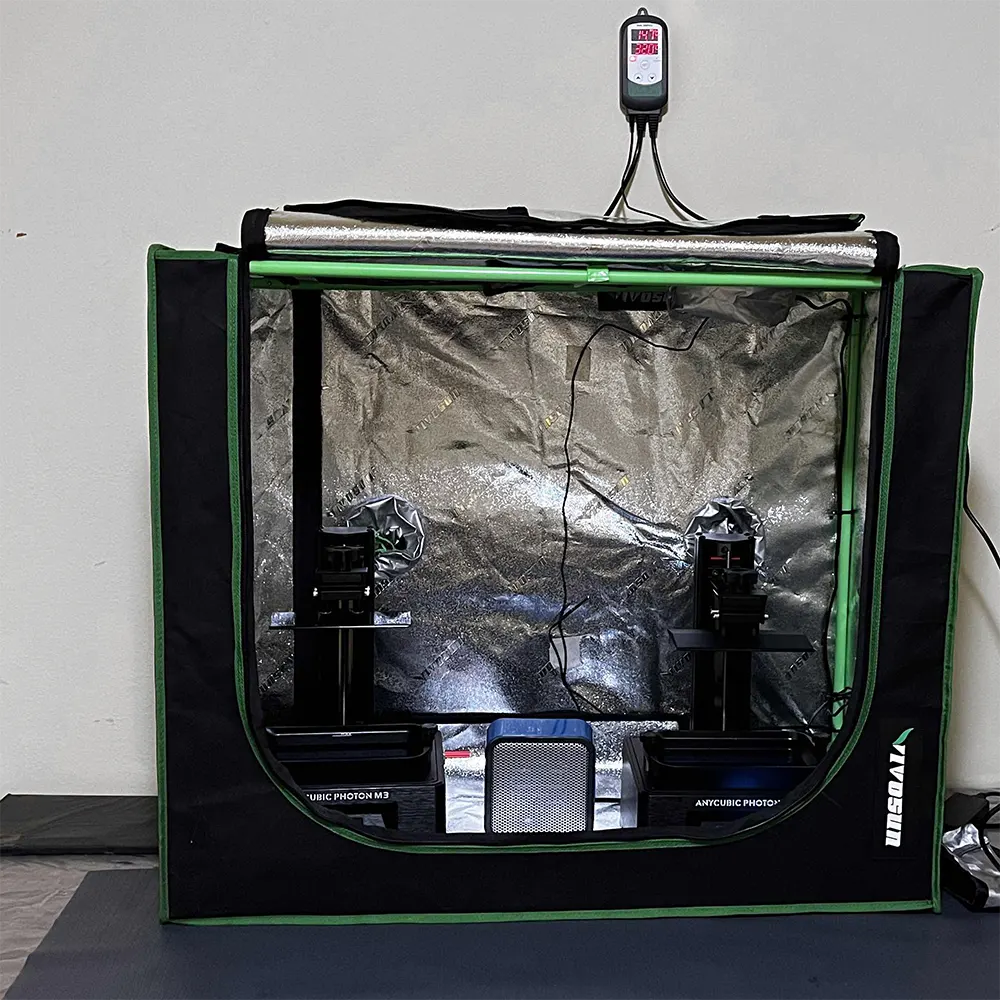
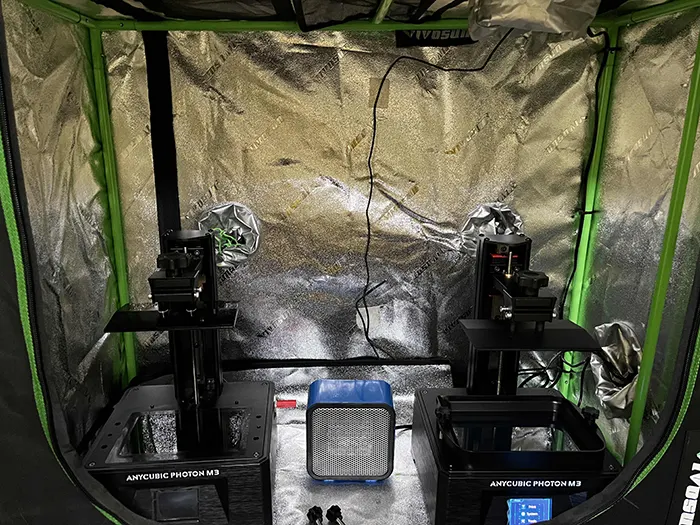
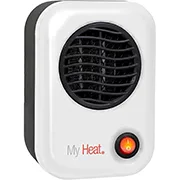
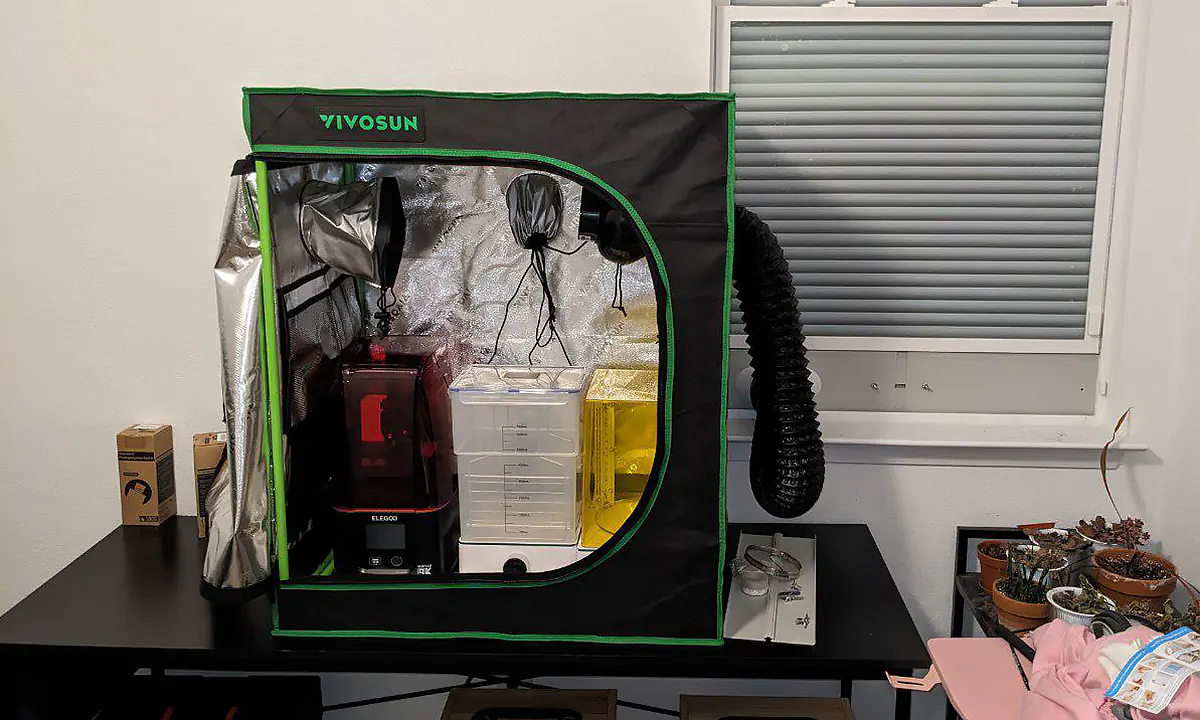
Our recommended method of heating includes a small ceramic heater with a temperature controller inside of a grow tent. This quickly heats up the tent to our desired temperature, heats the air for multiple printers at once, and saves money by not having to heat the entire room. We like printing at 30°C, but any temperature a bit below or above is just fine.
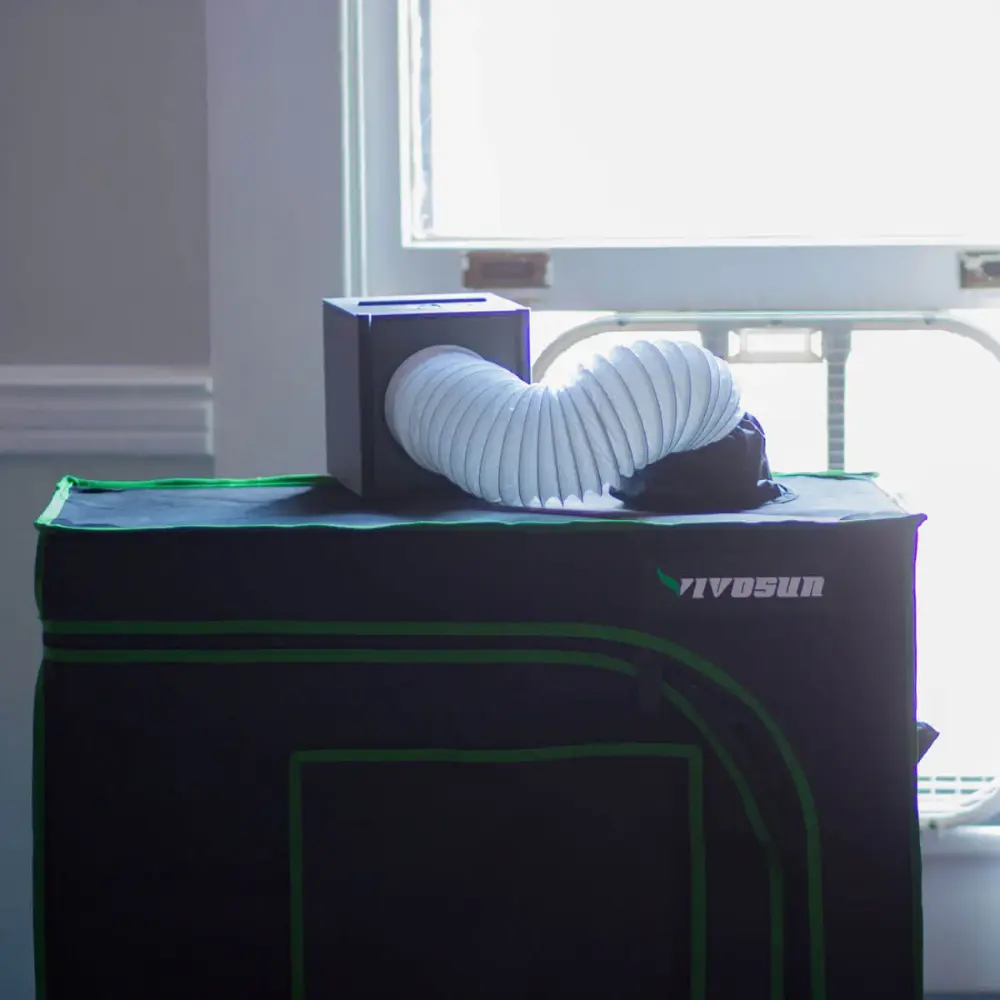
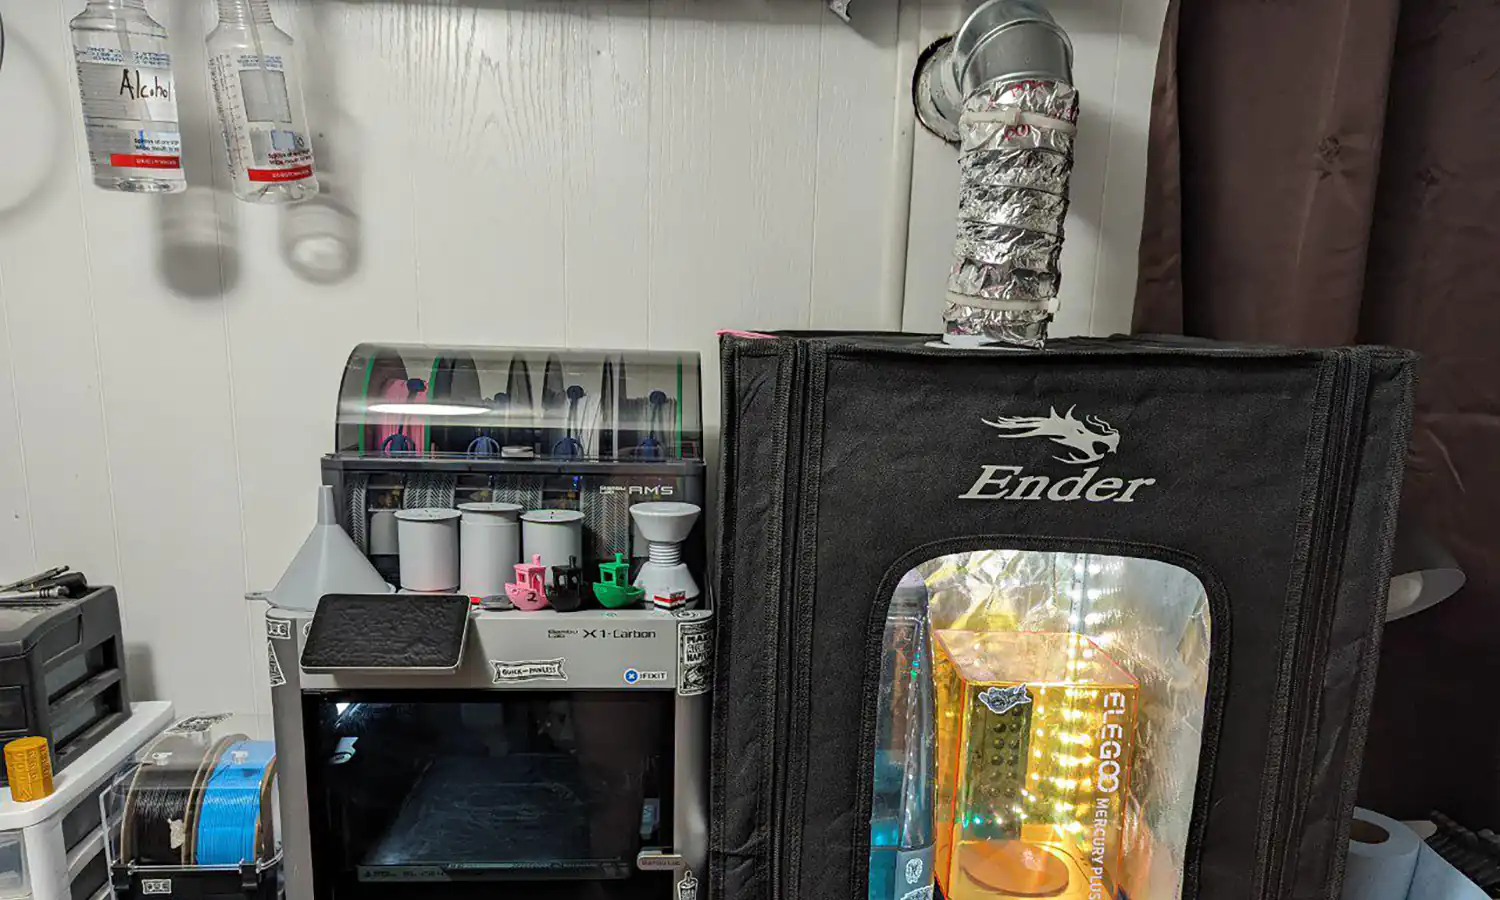
The fumes produced during resin printing can be vented with a grow tent using duct, a fan, and a window adapter. In ideal locations like our resin room or a garage, the grow tent can help contain the fumes and heat until a print is finished - then the fumes can be evacuated.
Resin printers that are inside a grow tent are shielded from outdoor UV light, so they do not need the covers on during printing. Grow tents typically come with a tray or liner on the bottom to protect against spills. If you are using a custom enclosure, it is advisable to include a tray or liner for spills.
Resin Printer Enclosure FAQ
It is recommended to get an enclosure for your resin printer in order to control ventilation and heating.
A resin printer placed indoors needs an enclosure to properly vent fumes. During winter, a resin printer in a garage should have an enclosure to insulate and contain heat.
A small or medium-sized resin printer should fit within an area of 12x12 inches, but extra space will be needed.
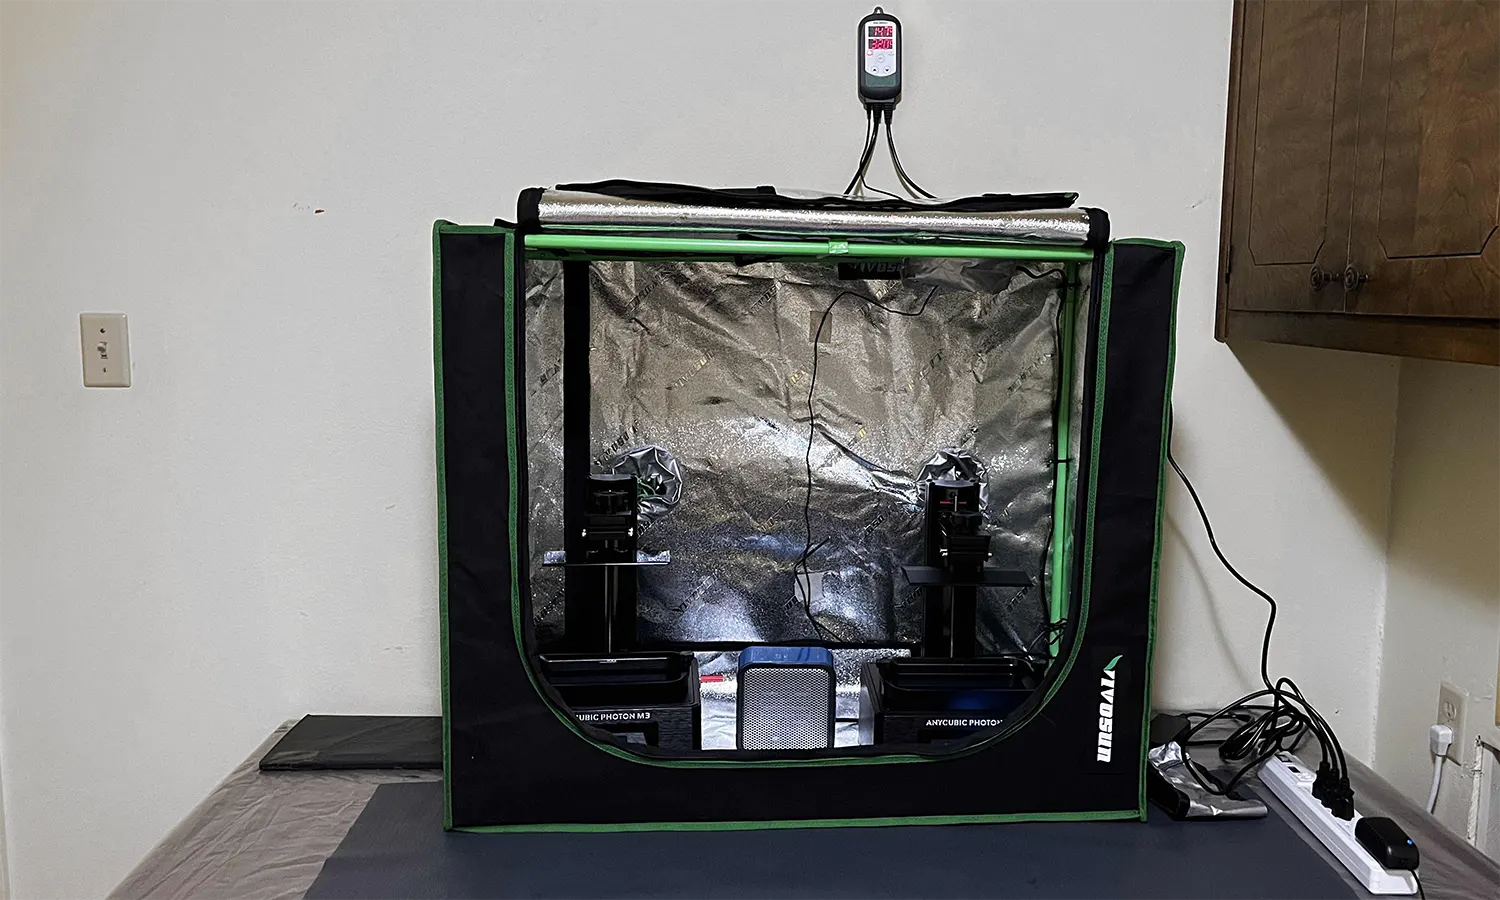
A 30x18x36" grow tent can fit two resin printers and a heater; although, it will be cramped. A grow tent this size would comfortably fit a single printer, a heater, and many bottles of resin.
A 24x24x32" grow tent can fit only a single resin printer. You should determine what you want to put in your enclosure and purchase one of adequate size. Tall grow tents can be used sideways, but the duct adapters built into the tent may result in an uneven floor.
The primary fire risk associated with resin printers is the heater used during winter, whereas the primary fire risk of a FDM printer is the bed and hotend.
An enclosure made of fabric, acrylic, or wood is vulnerable to fire but is affordable and easy to work with. An enclosure made of metal, glass, or mineral wool will be fire resistant.
All 3D printers should remain under supervision while in use, and it is recommended to have a smoke detector and fire extinguisher.
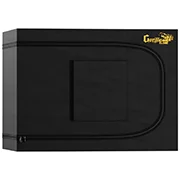
Grow Tents as a Resin Printer Enclosure
Grow tents are popular with resin printing because they are affordable, easy to setup, and sturdy.
A 30x18x36 inch grow tent retails between $70 to $100. It can comfortably fit a small or medium resin printer, a heater, and cleaning equipment. This size can fit two printers, but it will be cramped with a heater.
If you get a grow tent smaller than this or a large resin printer, always make sure to check the printer's dimensions. If you have the space, a larger grow tent can be useful to store multiple printers, cleaning equipment, resin bottles, and other supplies.
Psshhh ... Who Needs An Enclosure
Having an enclosure for your resin printer is not required, but the benefits do make it one of the most recommended add-ons.
Containing heat for the resin printer is one of the main reasons for an enclosure but there are some workarounds. If you plan on using a conduction heating source like a pad or coil on the vat, then you may not need an enclosure. Using a small forced-air heater under the printer cover would also work.
If you live in a warm environment year-round, like Florida, then you can probably get away with no heating at all. In fact, you may need to use an air conditioner if the excess heat is resulting in print failures.
In regard to ventilation, when the resin printer is placed outside of the residence you can get away with not having an enclosure. These locations would include a garage, workshop, or shed. Some people do place the printers on balconies or patios, and these locations will require an enclosure to block the ambient sunlight.
Other Enclosure Options
The primary 3D printing enclosure type promoted by other websites uses acrylic panels and costs $300-600. The DIY version of this usually involves Ikea Lack. Generally, we do not recommend using this type of enclosure as it is a waste of money compared to the grow tents. However, the use cases for a clear acrylic enclosure could be in a public space, professional workplace, or if you have a camera and are watching multiple printers.
For budget enclosures, we have seen some people use cardboard or wood. These can work but please be mindful of fire risks, and make sure to have a fire extinguisher on-hand.
For more enclosure inspiration, skip down to community examples.
Heating For Resin Printers
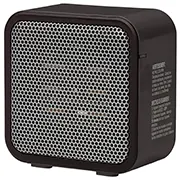
Our recommended method for heating resin printers uses a small forced-air ceramic heater in conjunction with a temperature controller and grow tent.
Resin manufacturers typically recommend printing at temperatures above 20°C (68°F). The ideal range varies from resin to resin; for example, engineering resin usually calls for temperatures above 25°C (77°F). Always check for the manufacturer's recommendations.
Typically, resin will not overheat until 40°C+ (104°F). As outdoor temperatures go up, add air conditioning or adjust your exposure times and support thickness. Temperatures that approach and are below freezing will cause your resin prints to fail. The resin can also begin to crystalize at these temperatures. The solution to this is storing and using resin in an appropriate environment.
To see simulations and thermal images, visit our page Heating Resin Printers During Winter.
Resin Printer Heating FAQ
Resin printers can be used in the cold provided that the resin stays at an appropriate temperature. Ideally, the resin printer would be in an enclosure with a heater.
The most common recommendation across manufacturers is that resin should stay above 20°C during printing. Some resins may work at 15°C and others require 25-35°C. Always check the manufacturer recommendations for the specific resin.
Unless the manufacturer calls for a higher temperature, we print all of our resin at 30°C. Any temperature less than 20°C is too cold, and anything above 40°C is too warm.
Small heating pads or belts can be placed directly onto the vat. Large heating pads can be placed on the inside or outside of the printer cover. These can be secured by nylon rope, rubber bands, or a temperature resistant adhesive. Do not use anything that could puncture the heating pad.
Small heat pads are efficient since they are in direct contact to the vat. The main downside is that they have no straightforward method of temperature control, which results in an inconsistent resin temperature. Also, you would need multiple heat pads, one for each printer and bottle of resin to preheat.
The wattage needed will depend on the environment temperature, insulation, and any air exchange. A 500 W heater is sufficient for most scenarios.
For a 30x18x36" grow tent in a garage and a desired printing temperature of 30°C, a 200 W ceramic heater will work for environment temperatures above 5°C. A 250 W heater is sufficient to -5°C, and a 500 W heater works in temperatures down to -35°C. Keep in mind that these are estimated values.
We recommend setting the temperature controller to turn off and on 2°C below and above your target temperature. For example, when printing at 30°C, the controller should turn on at 28°C and turn off at 32°C. This prevents the relay from rapidly switching, which can prolong its lifespan.
Convective Heating
Our recommended method for heating resin printers uses a small forced-air ceramic heater in conjunction with a temperature controller and grow tent.
This quickly heats up the tent to our desired temperature, preheats resin in bottles, heats the air for multiple printers, and saves money by not having to heat the entire room.
Advantages of ceramic heaters:
- Consistent temperature when used with a controller
- Uniform temperature across the print
- Heats the entire enclosure - good for multiple printers
- Quickly preheats resin in bottles
Disadvantages of ceramic heaters:
- Uses more energy than a heat pad or band
- Introduces a fire risk - look for heaters with tip-over protection
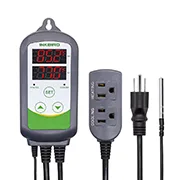
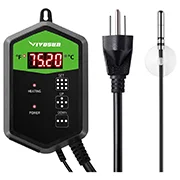
Temperature controllers pair perfectly with ceramic heaters. They are affordable, can be used with any heat source, and have a sensor probe. An ideal location for the sensor is low and away from the heater.
An alternative to using a temperature controller involves using a small heater with the temperature sensor built-in. These heaters will work but we do recommend using an IR thermometer to confirm the exact temperature of the resin.
Miniature convective heaters can be used inside of the printer cover. These use less energy than these ceramic heaters; however, they will require the cover to remain on, you will need one for each resin printer, and the miniature heater is more expensive than the ceramic heater and controller combined.
Larger heaters, in most cases, are not recommended due to the extra energy consumed and variation in the resulting resin temperature. If the room that contains the resin printer is being used for other purposes, then it may make sense to use a larger portable heater. Also, if the printer is being ventilated continuously, such as in an apartment, then a larger heater may be necessary.
Temperature Controllers
Temperature controllers create a reliable and consistent environment for resin printers.
Your heat source plugs straight into the controller, but make sure that the controller you purchase is rated for the wattage of the heat source.
The controller has a temperature sensor that should be placed low and away from the heater. This assists in creating a uniform temperature throughout the enclosure.
Conductive And Radiative Heating
Heat pads or belts make for a cheap way to warm resin in a vat or bottle. These are secured to the vat or bottle using a rubber band, nylon rope, or tape - do not use metal or anything that can puncture the pad.
This conduction heating method is fairly efficient since it is directly heating the resin, but the wattage is too low when the environmental temperature is approaching or below 5°C (41°F). Higher wattage silicone belts do exist, just be aware of fire and electrical risks.
Advantages of heat pads:
- More energy efficient than ceramic heaters
- Small heat pads are very cheap
- Less fire risk than ceramic heaters
Disadvantages of heat pads:
- You will need a heat pad or band for every printer
- Uneven heating, due in part to the pads or bands not wrapping around the entire vat
- Always on and difficult to get a consistent temperature
- Will not heat the build plate, which can chill the resin
- Sections of the cured resin print will rapidly cool due to the chilly air temperature
- Slow to preheat resin
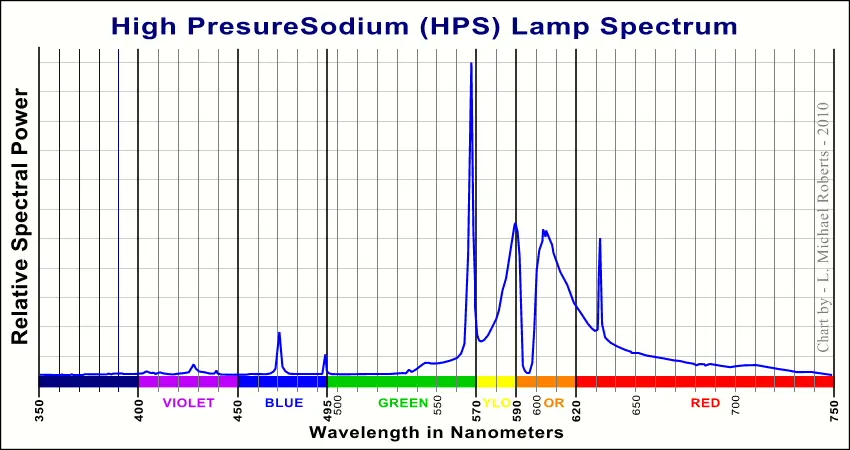
Any lights that are used near the printers should be LED bulbs that are away from 405 nm on the wavelength spectrum. These would be warm white to red colors.
When your light source needs to produce heat, high pressure sodium bulbs should be used since they produce minimal light near 405 nm.
Skipping The Heat
If you live in a part of the world where it is toasty (20°C+) for the entire year, then you should not need to use an external heat source. Additionally, the UV lights in the printer will raise the temperature of the resin slightly.
If you live in a part of the world where the winters are 10-20°C then you can probably get away with a small heat pad - anything colder will require a ceramic heater.
When you do not have a heater or choose not to get one, you can attempt to compensate with a few tricks:
- Use a resin with low viscosity (thin/watery)
- Increase the base and normal exposure times
- Increase the light-off delay to 2-5 seconds
- Use thicker supports
Ventilation for Resin Printers
The safest place for a resin printer long-term is outside the home in a garage or workshop
It is recommended to place your resin printer in a garage or workshop. This minimizes the amount of fumes that enter your home, and it will save you time and money on equipment.
If you place a resin printer in your house, it should ideally be in a separate and sealed room with proper ventilation.
To see simulations and examples on ventilation, visit our page DIY Ventilation & Filtration.
Resin Printer Ventilation FAQ
The easiest way to vent resin fumes is via duct from an enclosure to a window adapter. A fan will pull contaminated air in the enclosure out through the window.
It is possible to sufficiently ventilate a resin printer if you have a window, patio, or balcony. If the printer is placed on a patio or balcony, it will need an enclosure to prevent exposure from sunlight, but you will not need any duct or fans. A printer vented out a window will need an enclosure, duct, fan, and window adapter.
If you live in student housing, we recommend against getting a resin printer. If complaints are made, at the very least, you could be forced to remove the printer. Beyond the fumes, the IPA used would be declared a potential fire hazard. College libraries and city makerspaces should have the printers needed for your projects.
The garage is one of the best places for a resin printer. Placing the printer in a garage will prevent fumes from entering your home.
When a printing session has concluded, the garage can be vented via fan or by opening the doors.
Resin printers can be put outside if they have protection from the elements. An enclosure like a grow tent will provide sufficient protection.
Maximize Ventilation Outside the Home
It is ideal to place resin printers outside the residence.
If your workspace is well vented in a garage that has good airflow, then you can leave your printer and equipment on a table without an enclosure. When a printing session concludes then you can vent out the area while you are cleaning. This works until the temperature drops and a heat source needs to be added.
If your garage, shop, shed, or detached room is not well ventilated then it is recommended to place the resin printer in an enclosure, like a grow tent, so you can control the ventilation. Presumably, a grow tent is already needed for winter.
Especially during winter, you can leave the ventilation fan off until printing has concluded, provided that people are not in proximity long-term. This prevents the ceramic heater from continuously running, which saves energy and stabilizes the resin temperature. When printing has concluded, you can turn the ventilation fan on high to quickly evacuate fumes.
Interactive Resin Printer Setup
Double click or tap to go full screen, pan around 360°, and select the outlined items to learn more.Venting Resin Printers in Houses
Ventilation is required when resin printers are placed inside your home.
Resin printers inside the residence should be placed in a separate and sealed room. Duct will connect a window adapter to the resin printer or its enclosure. You could drill a hole through the wall but that is not always practical. To assist in controlling the ventilation of fumes, an enclosure like a grow tent is recommended.
While printing, it is appropriate to have the ventilation fan on low to medium, so as to remove fumes but not vent an excess of warmed/cooled indoor air.
When printing has concluded and you are cleaning, it is appropriate to have the ventilation fan on medium to high, so as to excavate the resin and IPA VOCs.
While not printing, the ventilation fan should remain on low if you plan to leave resin in the vat or isopropyl alcohol is able to evaporate.
Venting Resin Printers in Apartments
Resin printing while living in an apartment is possible, especially if you have windows that open, a patio, or a balcony. An apartment follows the same recommendations as in a house.
If you are in student living, such as a dorm, we do not recommend getting a resin printer. Dorms often have no method of ventilation and any complaints, at minimum, could force you to get rid of the printer. As an alternative, it is likely that your university library or city makerspace will have printers.
How Our Resin Room Uses Ventilation Fans
When it is summer and the temperature outside is ~25-35°C (77-95°F):
- We keep our resin printers outside of their enclosure and on the table.
- On high speed, our inlet fan brings clean air in through one of our Promethean air cleaners (only a MERV 13 filter). This reduces dust in the room.
- On high speed, our outlet fan vents the entire room before, during, and after printing.
When it is summer and the temperature outside is ~40°C+ (104°F):
- We keep our resin printers outside of their enclosure and on the table.
- A portable AC window unit is put on low to medium in order to cool the room.
- On low speed, our inlet fan brings clean air in through one of our Promethean air cleaners (only a MERV 13 filter). This reduces dust in the room.
- On low speed, our outlet fan vents the entire room during printing.
- Both the inlet and outlet fans are turned on high when printing has concluded and cleaning has begun. Afterwards, the fans are left on high, and the AC unit is turned off.
When winter is coming and the temperature outside is below ~20-25°C (68-77°F):
- We keep our resin printers inside a grow tent and the heater temperature set to ~30°C.
- On low speed, our inlet fan brings clean air in through one of our Promethean air cleaners (only a MERV 13 filter). This reduces dust in the room.
- On low speed, our outlet fan vents the entire room during printing.
- Both the inlet and outlet fans are turned on high when printing has concluded and cleaning has begun. Afterwards, the fans are left on low, and the heater is turned off.
Currently, we only have the inlet and outlet fan, but we are considering adding more in order to install a fume hood.
When installing the ventilation fans, we must be mindful of negative and positive pressure. If the total flow rate of the outlet fan is higher than the inlet fans then the room is a negative pressure environment, which will pull air into the room through cracks and household HVAC duct. This is the desired scenario.
If the total flow rate of the outlet fan is less than the inlet fan then the room is a positive pressure environment, which will push contaminated air through cracks and household HVAC duct. This is undesirable. The simple answer to this is installing a single outlet fan, especially if your resin printer is inside the house.
Using Filtration with Resin Printers
Resin printers should only use filtration as a secondary defense or mitigation
Installing ventilation should always be the primary focus, with filtration acting as a secondary defense.
The efficient removal of VOCs will require a bed of activated carbon granules or pellets. Impregnated foam is not recommended since it is not as efficient nor as long-lasting as granules.
The capture efficiency of professional/industrial activated carbon systems can be 92-98%, but smaller units with a carbon thickness of 1-2 inches only have an efficiency of 40-60% per pass.
The capture efficiency of carbon will vary depending on the chemicals, impregnation, thickness, temperature, air speed, and etc. The efficiency will decrease when the carbon surpasses a saturation threshold dependent on the thickness of its mass transfer zone.
Resin Filtration FAQ
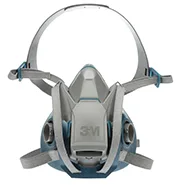
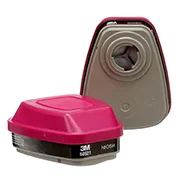
A respirator is highly recommended when interacting with your resin printer. The most critical moments are during printing and cleaning. A 3M half facepiece with a 60921 or 60926 cartridge is affordable and sufficient.
A N95 mask or P100 cartridge is not suitable for resin. This filter media only captures particulates. Activated carbon is required to capture VOCs.
Activated carbon is required to capture resin fumes, ideally carbon granules.
HEPA filter media is often the selling point for a household air cleaner, but this only captures particulates. The air cleaner would need to have activated carbon in order to be effective against resin fumes. Ideally, this would be granules instead of powder on particulate filter media.
Activated carbon does capture VOCs from resin but it is not perfect. The capture efficiency of professional/industrial activated carbon systems can be 92-98%, but smaller units with a carbon thickness of 1-2 inches have an efficiency of 40-60% per pass.
How Our Resin Room Uses Filtration
Our resin room does not use fume extraction since it is well ventilated.
We do use one of our Promethean air cleaners to filter outdoor air coming into the room. This drastically reduces dust that could contaminate resin or equipment.
When and Where to Use Filtration
Fume extractors are designed to remove the majority of containments from the air leaving an enclosure. They are ideal when ventilation is minimal or additional protection is desired.
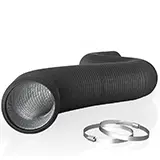
The Promethean fume extractor is offered as an affordable alternative that can be hooked up using duct, be inside an enclosure, or next to the printer - the high flow rate allows it to act similar to a normal air cleaner.
The BOFA fume extractors utilize HEPA media, have a thicker carbon bed, and are a bit more quiet - the downside is the price bump.
Miniature air cleaners are designed to be placed inside the cover of a resin printer. They are ideal when additional protection is desired, since they help capture VOCs before exiting the enclosure into a fume extractor, leak into the room, or exit the room via duct.
Miniature air cleaners use activated carbon, so they be able to capture fumes at an efficiency of 40-60% per pass, until they become saturated. Particulates will not be captured to any meaningful extent.
The P Mini air cleaner's files are free to download, it uses a blower fan with a higher static pressure, the extra battery capacity gives additional hours of use, and the thick carbon bed will have a longer life and higher capture efficiency.
Canisters of carbon are an affordable option for DIY fume extraction for resin printers. The canisters can be used to filter and recirculate the air in an enclosure such as a grow tent, or they can be used to capture the majority of contaminants before venting. These do not capture particulates to any meaningful extent; thus, they should not be used for FDM without a particulate filter.
Generally, we do not recommend carbon canisters that contain bituminous coal activated carbon. Coconut shell carbon contains less dust, has a higher holding capacity, and is renewable.
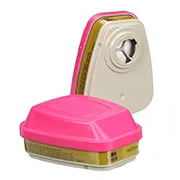
PPE - Using Your Respirator
Respirators are a must-have when interacting with resin, and thankfully, 3M has affordable facepieces and cartridges.
To find more information on the respirators, visit our Resin Respirators article.
Cleaning Equipment for Resin Printing
Uncured resin has to be removed from a print, and this can be done DIY or with machines
Resin Cleaning and Curing FAQ
Resin printed parts can be cleaned using IPA or a degreaser such as Mean Green. The cleaning can be done manually, with a wash & cure machine, or with an ultrasonic cleaner. Once fully cleaned, the parts will need to be post-cured with UV light.
Yes, resin parts can be cleaned with isopropyl alcohol. The ideal percentage for IPA is 91% since it cleans well, is affordable, and is widely available.
Most resin can not be effectively cleaned with water alone - a solvent or degreaser is often needed. Disposing of contaminated water is more difficult than IPA.
A wash & cure machine is not needed for resin printing, but it does streamline the process, especially if you print a lot. Resin prints can be manually cleaned by agitation in IPA.
Resin prints can be cleaned in an ultrasonic cleaner two ways:
The ultrasonic cleaner can be filled with an indeterminate mixture of water and a degreaser, such as Mean Green. This method may be cheaper but it results in a considerable amount of contaminated water.
Alternatively, the ultrasonic cleaner could be filled with only water. The resin print, along with 91% IPA, is placed into a plastic zipper bag. The bag is slowly lowered into the water before closing the zipper. This will remove most of the air from the bag. This process is relatively safe and was documented by NASA over 50 years ago.
Resin or contaminated liquids should never be poured down a municipal or septic drain. Contaminated water or solvents should be cured and left to evaporate. Cured solid resin can be disposed as normal waste.
Resin can only go down a drain that leads to a holding tank designed for chemicals. While this is normally reserved for a laboratory, it can be recreated under the right circumstances.
Resin prints can be cured with a UV lamp or a wash & cure machine. If done manually, it is common to use a solar turntable and a reflective curing box to ensure uniform curing.
Relatively flat resin prints can be clear coated with a liquid or aerosol. FDM prints would have to be coated with an aerosol. Make sure to pick a clear coat appropriate for your needs; these may include UV protection or safe handling.
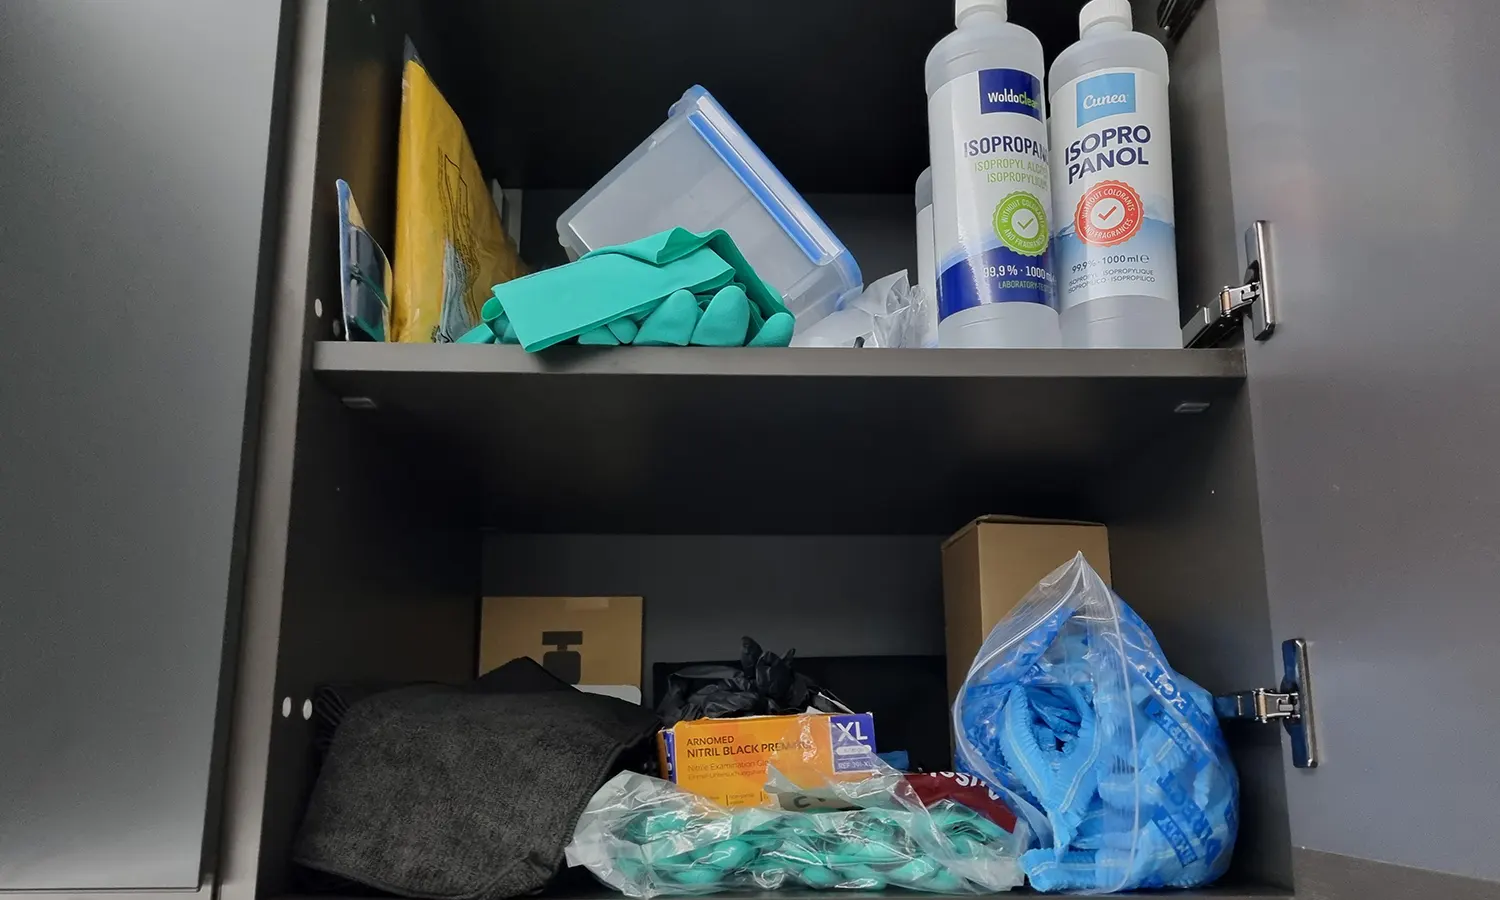
Cleaning Equipment in Our Resin Room
The equipment we use for cleaning resin prints is our resin sink, IPA squirt bottle, normal white paper towels, brown kraft paper towels, ultrasonic cleaner, hairdryer, solar turntable, and UV lamp.
After taking prints off the build plate, we hold them inside the sink and squirt on some 91% IPA. The IPA gets wiped off by a white paper towel and/or a small amount of water. This process may be repeated a few times.
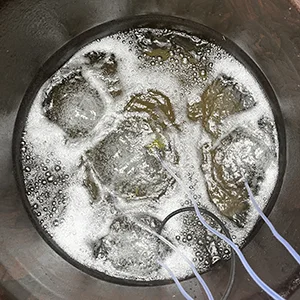
The partially cleaned prints are placed into a zipper polybag full of 91% IPA. The polybag zipper is mostly closed, leaving a small section for air to escape. As you push the bag down into the water in the ultrasonic cleaner, a vacuum is pulled inside the polybag.
This safe method was documented by NASA over 50 years ago. As a bonus, keeping the solvent in the bag isolates the contaminated IPA, minimizing the mess.
The prints are left in the ultrasonic cleaner for ~2 minutes with a water temperature of 30°C.
When pulled out of the ultrasonic cleaner, the prints are full of IPA, so they are held over the sink and blow-dried. The mostly dry prints are placed on top of brown kraft paper on a table to finish drying.
After an indeterminate amount of time, the prints are checked to ensure uncured resin is completely removed - uncured resin will show up glossy. The prints are cured using the turntable and UV lamp.
After curing, we typically clearcoat the prints to increase UV protection and handling safety.
Developing a Dedicated Sink for Resin
Contaminated water, solvents, and resin should never be poured down a municipal or septic tank drain. Any sink that is to be used for these liquids needs to drain into an isolated tank.
Click here to learn more about operating a resin sink. (wip)
The main challenges of creating an isolated tank are proper plumbing, a durable holding tank, and eliminating the wastewater. The plumbing needs to be gravity fed or a pump must be added; since solvents are in play, a gravity fed system should be used. The holding tank can be any container able to withstand the resin and solvent chemicals. The wastewater will naturally evaporate at a slow rate but forced evaporation will speed up the process.
The resin sink can be any utility tub. A compatible faucet needs to be installed. Any compatible P-Trap can be used, but we opted for a clear version that can be removed. The advantage is that settled resin can be removed and cleaned. The downside is that the ABS plastic it is made of is vulnerable to acetone - so avoid acetone.
The tubing that drains into the tank could be PVC, polyethylene, or PEX. Avoid polymers, like polypropylene, that are vulnerable to UV rays from the sun. The tubing internal diameter should be no less than 1/2", as anything smaller will not properly drain. We recommend using a size that is 3/4" to 1-1/2".
Blue 55-gallon barrel drums are a good choice for a holding tank as they are abundant, affordable, and commonly used to hold chemicals. These can be found new on industrial websites or amazon, and there are cheap used ones on Craigslist or Facebook marketplace. If you buy used ones, we recommend trying to find ones that were not used to hold other chemicals; it should be easy to find ones that held food-related liquids, coffee, and etc.
We used a 55-gallon metal barrel, as a few were on-site already. Since the barrel is metal and it will be outside, we coated the interior and exterior in a protective enamel. Additionally, we will add a drum liner. A liner thermally insulates the water, protects the metal from the contaminated water, and will make disposal of cured resin a breeze.
The holding tank will need to be protected from rain, animals, and insects. An aluminum mesh over the opening prevents wildlife from gaining access, and acrylic panels stop rainwater while allowing the sun to heat the barrel. Depending on the temperature, pressure, and humidity level, it can take days to weeks to naturally evaporate a single gallon of contaminated water.
By using a self-regulating water heater and an air pump, it is possible to evaporate 3 gallons of water per day when the temperature is ~40°F (4.4°C). The water heater uses 1,000 watts, which at $0.13 per kWh for 24 hours is $3.12. Simply put, it would cost ~$1 to evaporate a single gallon of contaminated water.
This is a reasonable method for disposing of contaminated water, but it will cost energy/money. This system is better utilized in a warm climate where the rate of natural evaporation is higher.
This system could be supplemented or substituted with technologies such as solar (electrical) panels or solar thermal heating. Such add-ons are currently out of scope for our article regarding the development of a sink dedicated for resin.
DIY Cleaning Prints
Solar turntables and a dedicated UV lamp are necessary if you do not get a wash & cure or ultrasonic cleaner. Also, the lamp can be useful for curing contaminated cleaning solution, resin on reusable gloves, and spills.
Wash and Cure Machines
Wash and cure machines streamline your post-processing experience and are highly recommended if you can afford them - manual washing and curing will work but obviously requires more time and effort.
Ultrasonic Cleaners
Ultrasonic cleaners are useful for large prints, cleaning cavities, sensitive parts, and complex designs such as miniature honeycomb.
Triple check the tank dimensions to match the largest print that you will be making. We bought the 10-liter variant, which fits prints from a small or medium resin printer.
Miscellaneous Cleaning Equipment
Nitrile gloves should be used when working with resin.
The disposable gloves maintain dexterity but can rip on sharp corners of resin parts.
Thick nitrile gloves can be reused dozens of times by washing them with IPA and curing them with UV before removal. The thicker gloves have a longer cuff and are useful when cleaning prints in the sink.
The orange 4.5mil nitrile gloves made by ASAP are our favorite so far - they are comfortable, don't tear as often, and are easy to take on and off. We are actively trialing nitrile gloves with varying thickness and cuff length.
Silicone mats are a nonporous worksurface that are ideal for setting the printer, resin, and uncured prints on top of. These mats are cheap but thin.
Your new printer might come with a micro cutter; if not, they are a cheap yet valuable accessory for removing supports.
The complex geometry and cavities of resin prints can harbor uncured resin, and bamboo toothbrushes are a cheap tool to manually clean prints.
A hairdryer is a must have in order to quickly dry prints before curing. Using no or low heat is appropriate since prints can deform under high temperatures.
Putting a UV-protective clear coat on resin prints can increase handling safety, prevent yellowing, and mitigate cracks. The variants of the Krylon aerosol are crystal clear, UV-resistant matte, and UV-resistant gloss.
Everbrite offers three coatings that are anti-microbial, general-use, or UV-resistant. These coatings come in an aerosol or liquid. The Crobial and ProtectaClear coatings are advertised as skin and food safe once cured.
Crobial Coat is useful for keycaps, light switches, routinely handled objects, and any items near food or in a kitchen.
ProtectaClear is a general use clear coat that is thin, abrasion-resistant, and chemical-resistant.
The Everbrite coating is formulated for increased UV resistance.
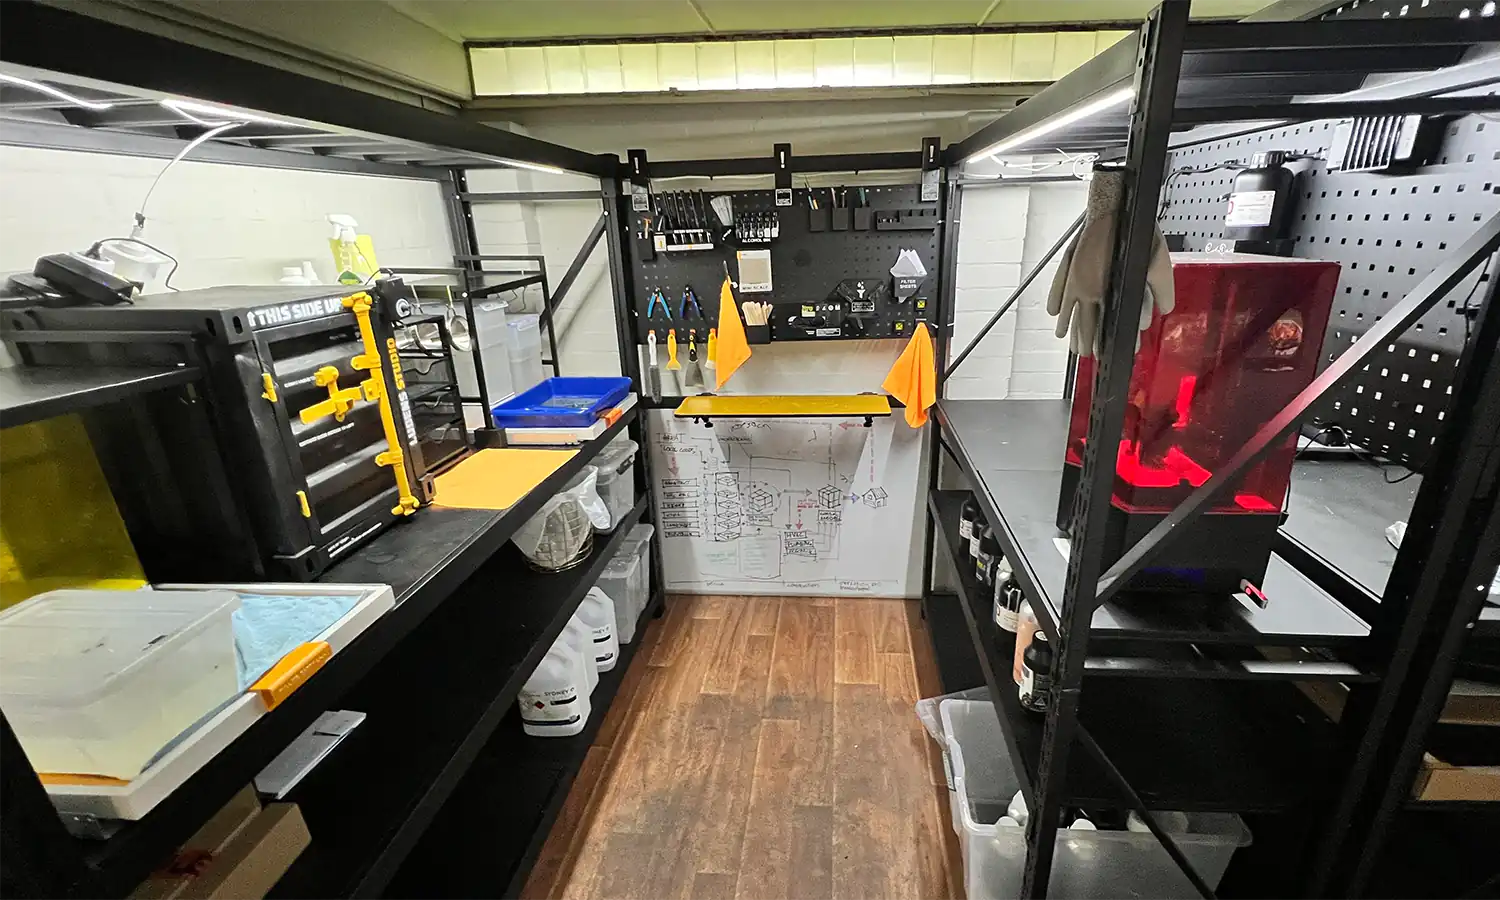
Community Resin Setups
Submit your awesome 3D printer setup!
Email entries to [email protected] or on discord in the #showcase channel. We prefer the images to be landscape and at minimum 1,500x900px. Try to capture the essence of your setup in a single photo. If you have an exceptional setup that needs multiple photos, we'll use multiple slots or create a small slideshow.

Disclaimer: You assume all responsibility and risk for the use of, but not limited to, the resources, advice, and opinions of 4D Filtration or its employees. 4D Filtration or its employees do not assume any liability or create any warranty for the use of any information. 4D Filtration may receive commissions for referral links. Prices are approximated for simplicity and they may fluctuate due to sales or markdowns. Amazon .com should refer you to your local amazon site if you are not in the United States; there is a chance Amazon's link redirect system will take you to a different product.